WANT TO UPGRADE YOUR KITCHEN CABINETS ON A BUDGET?
Check out our Do-It-Together cabinet painting offer!




Buying a new home takes a large chunk out of your savings, not to mention now you have a monthly mortgage payment. Budget friendly decorating projects can get your home looking good without breaking the bank. Here are some ideas to get started.
If you haven’t already noticed, curtains are expensive. If your new home has a lot of windows without any cover on them, consider getting painter’s canvas drop cloths and using them as curtains. Canvas drop cloths come is various sizes and don’t cost very much. You can get a 4-foot by 12-foot panel for $9 at Harbor Freight Tools. They are also available at Lowes and Home Depot. Canvas drop cloth can also be used as a table cloth. If it’s a little bit too plain for you, add a runner down the middle to bring to color to it.
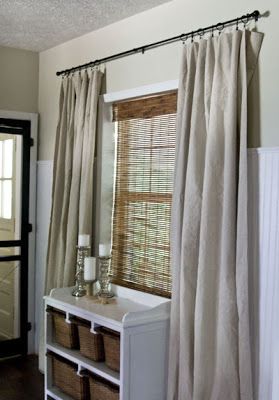
Canvas Drop Cloth Curtains
Don’t have a lot of decorations for the kitchen? What about your glassware – use a pitcher, old or new glasses, bottles, or jars to add some practical decoration to an open shelf. If there’s not enough color add some succulents throughout. By using your glassware, you’ll save room in your cabinets for things you don’t want on display.
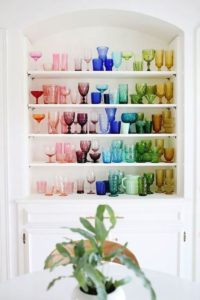
Glassware Decor
A stylish shelf can add so much to a room. It creates a focal point and it allows you to have a place where you can put books, plants, or jars to add more color to a room. A shelf project can be done in an afternoon and won’t cost you a fortune.
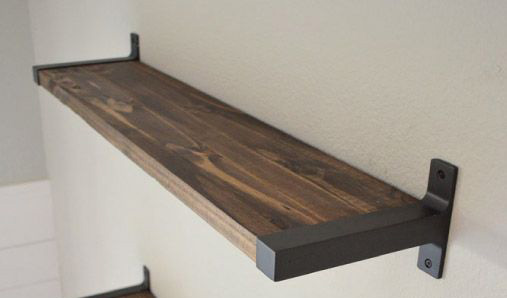
Rustic Shelf
Stacked books arranged on a shelf or end table work well as an easy decoration. Plus, it doesn’t cost you anything if you already have a lot of books.
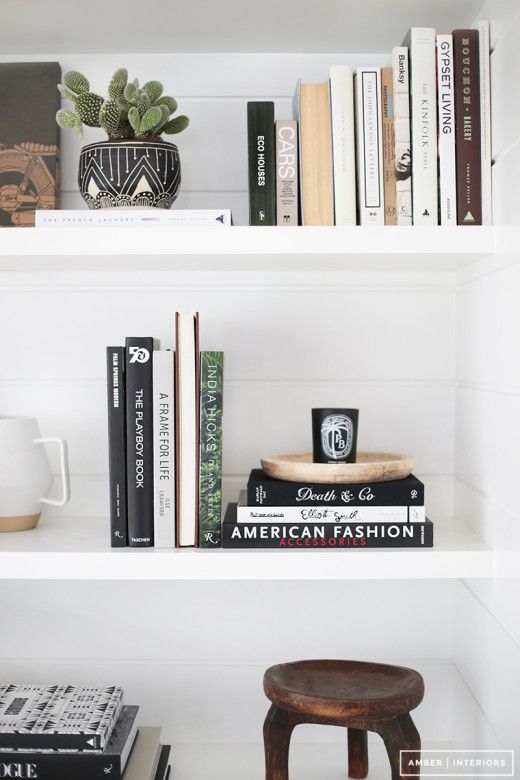
Stacked Books
String art is an easy way to add decorations around your house for cheap. There are all kinds of patterns you can find on Pinterest. All you have to do is a wooden board or boards, nails, and string. Find the pattern or word you want, scale it to your wooden board, print it out, tape it down on your board and hammer in the nails (not all the way) according to the pattern. Once all the nails are in, wrap the string around the nail heads and make your pattern. This project can be done in an afternoon.
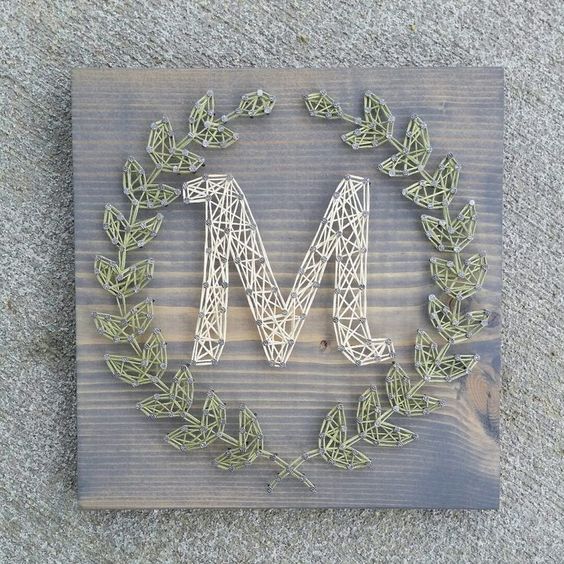
String Art
Sound Finish Provides the highest quality cabinet coatings in the industry because cabinet coatings are our primary focus and our specialty. With 20+ years of experience, our unique system paints your kitchen cabinets in 2-3 days!
Learn more and schedule a consultation today!

Renting an apartment with a small kitchen can be tough because you are so limited in what you can do to make it your own. But there are ways to spruce up that small, bland kitchen without making permanent changes.
If you don’t like the way your cabinets look, remove a door! You can open up your cabinets to display dishes and add a little bit of decoration. Depending on the style of your dishes you can add some much-needed color to a bland kitchen. If your dishes are bland too, check with your landlord to see if you can paint the back wall of the cabinets.
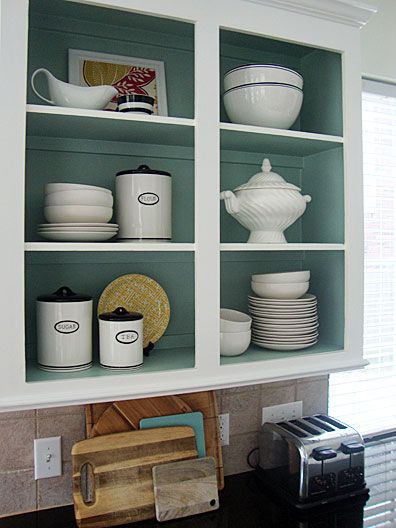
Open Cabinets
An old faucet can be too short, have bad water pressure, or become loose over time. You use your kitchen sink every day, so a new faucet that works properly will make your life easier.
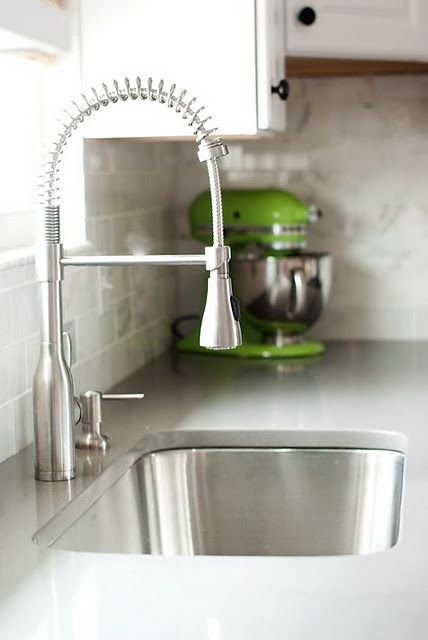
New Kitchen Faucet
You may not own the apartment you live in, but you do own some of the stuff inside it. Add some color to your kitchen chairs by painting them or adding a patterned cushion.
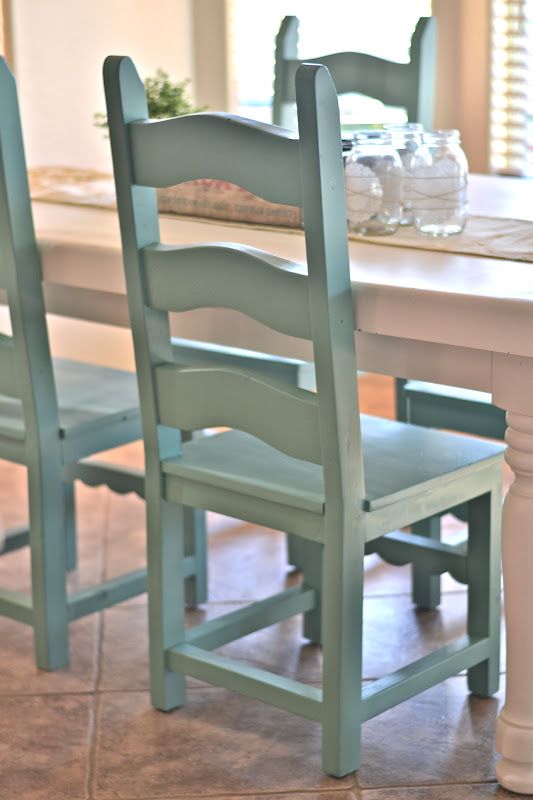
Colorful Kitchen Chairs
Outdated pendant lights can really make a kitchen look old and bland. If they are outdated, it’s likely that they don’t provide the best light either. Install new, modern pendant lights that will brighten up your kitchen.

Modern Pendant Lights
If you have ugly kitchen floors that you aren’t able to change because of your landlord, try using a rug to cover them up. You can work with the color scheme of your kitchen to make it all flow together. Be sure to get one you can clean easily since the kitchen is a high traffic area and food ends up on the floor all the time.
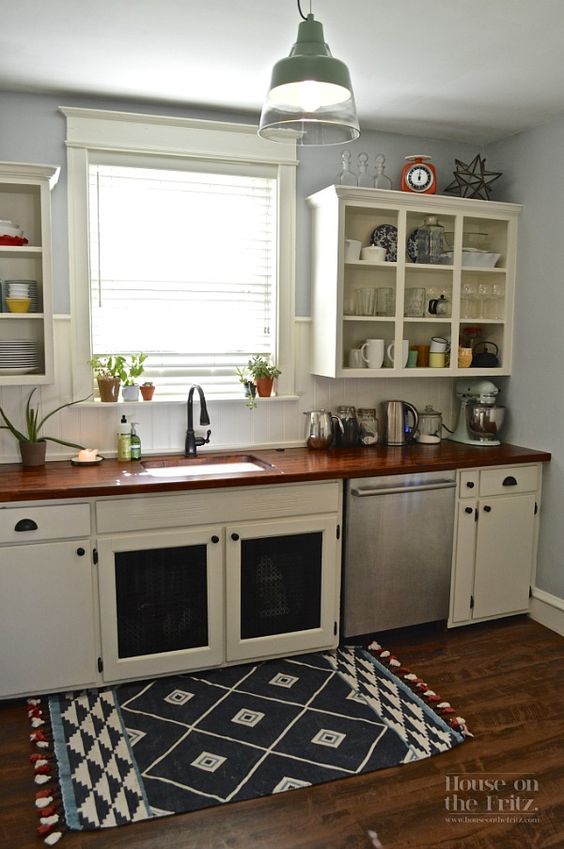
Kitchen Rug
Make sure you check with your landlord to see if it’s okay to paint your cabinets. Painted cabinets can make a huge difference in your kitchen, brightening it up and adding your own style.
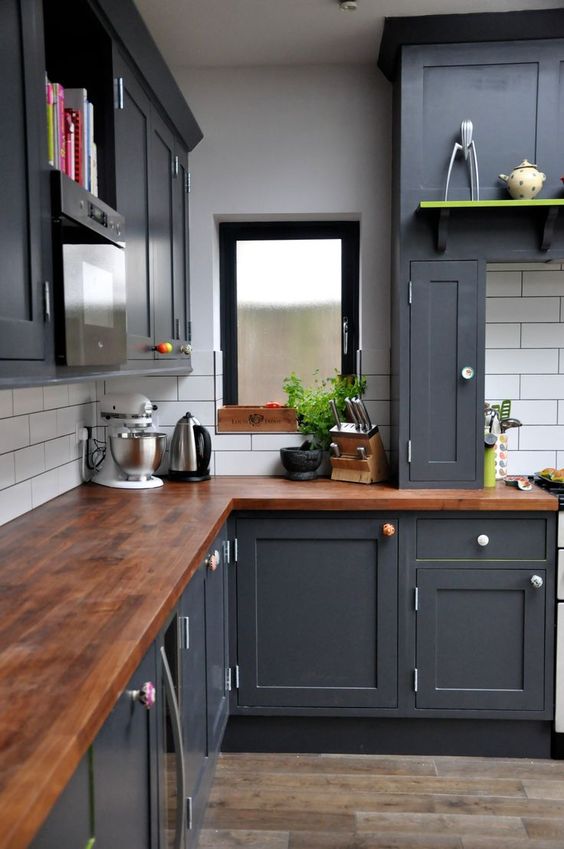
Painted Kitchen Cabinets
Sound Finish Provides the highest quality cabinet coatings in the industry because cabinet coatings are our primary focus and our specialty. With 20+ years of experience, our unique system paints your kitchen cabinets in 2-3 days!
Learn more and schedule a consultation today!
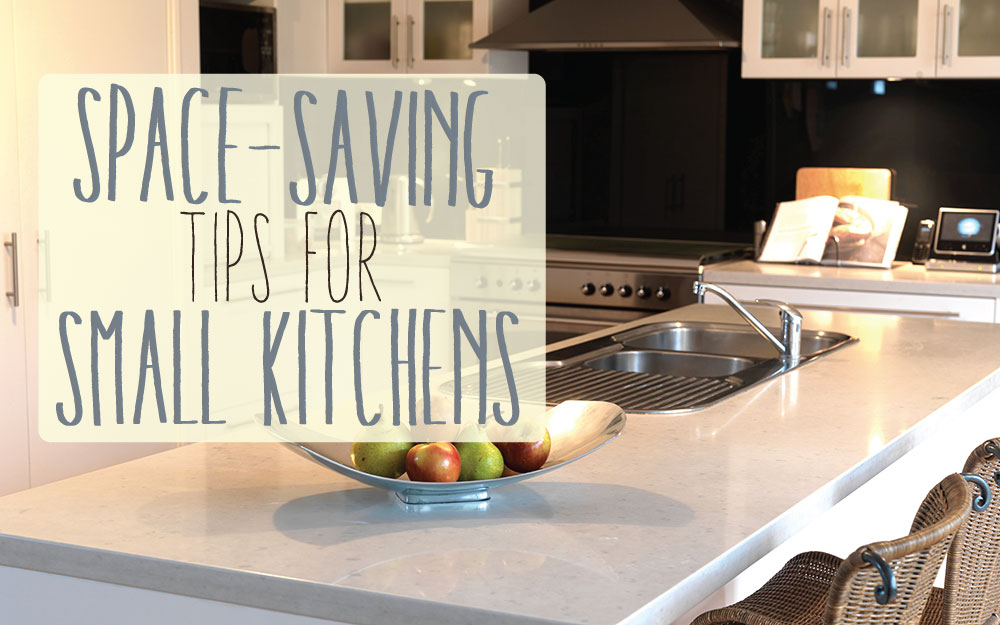
If you have a small kitchen, you’re probably always looking for ways to free up space. You can make your kitchen more efficient with these space-saving tips for small kitchens.
Removing a wall is the best way to open up a kitchen and make it more spacious. If you are doing a kitchen remodel, then you can make a peninsula countertop. With this design, you can add cabinets or shelves below the countertop, have bar stool seating, and be able to talk to people in the other room while you are cooking. It will also give you more counter space for those meals that require a lot of dishes.
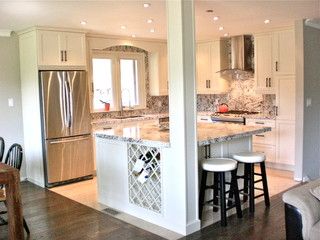
Small Open Kitchen
Corner cabinets can be tricky because the items inside can be hard to get to. But by adding a lazy Susan or pull out shelves you can get the most out of the space. With either of these options, you can find what you’re looking for and not waste the valuable space.
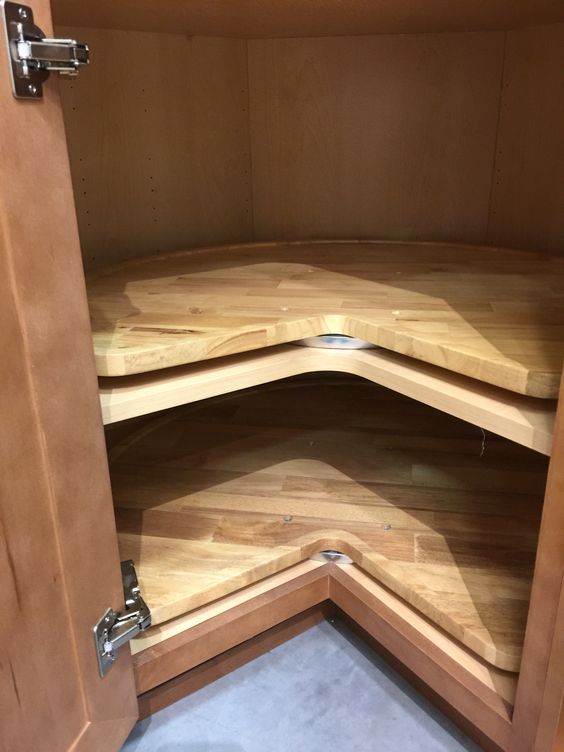
Lazy Susan
Even if you have a small kitchen, it’s likely that you have a place for a kitchen table as well. Opt for a smaller kitchen table and use the extra space to put in a hutch or small table with shelves. If you don’t want to pay the money for one of these options, consider building your own wall-mounted shelves. You can use these storage solutions to display your dishes. Having them in the eating area will be convenient since they will be so close to the table already.
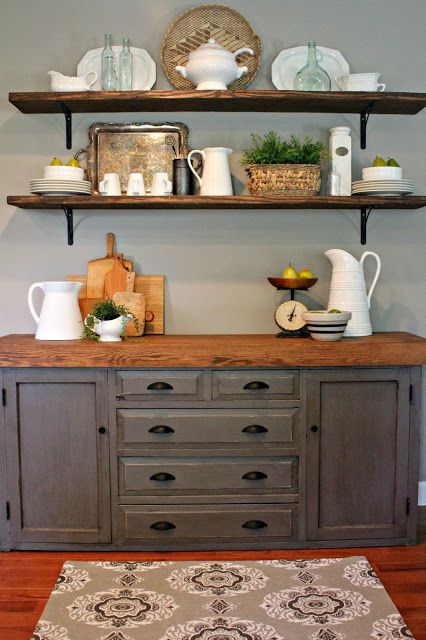
Extra Kitchen Storage
If you have any closets nearby the kitchen, then re-organize them to make a little bit of extra space. Add in extra shelves or roll-out drawers. You can use the space to store kitchen items that you don’t use very often, like cookie sheets, canned food, extra condiments, or cleaning supplies.
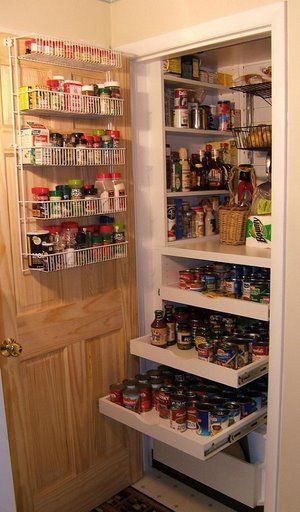
Converted Hall Closet to Pantry
If you don’t have good lighting in part of your kitchen, it’s likely that you don’t use it as often as you could. Consider installing under cabinet lighting to make every part of your counters usable. If you’re not doing a full kitchen remodel, wiring the lights can be a bit difficult. You can wire them through the basement, crawlspace, or attic and pull it through the spaces for each light fixture. If you don’t want to deal with wiring, there are wireless under cabinet lighting options.
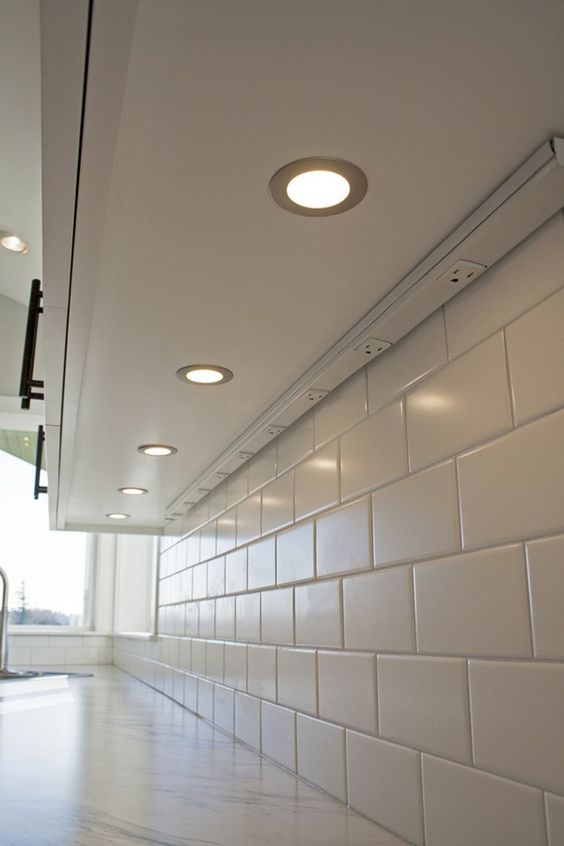
Under Cabinet Lighting
Sound Finish Provides the highest quality cabinet coatings in the industry because cabinet coatings are our primary focus and our specialty. With 20+ years of experience, our unique system paints your kitchen cabinets in 2-3 days!
Learn more and schedule a consultation today!
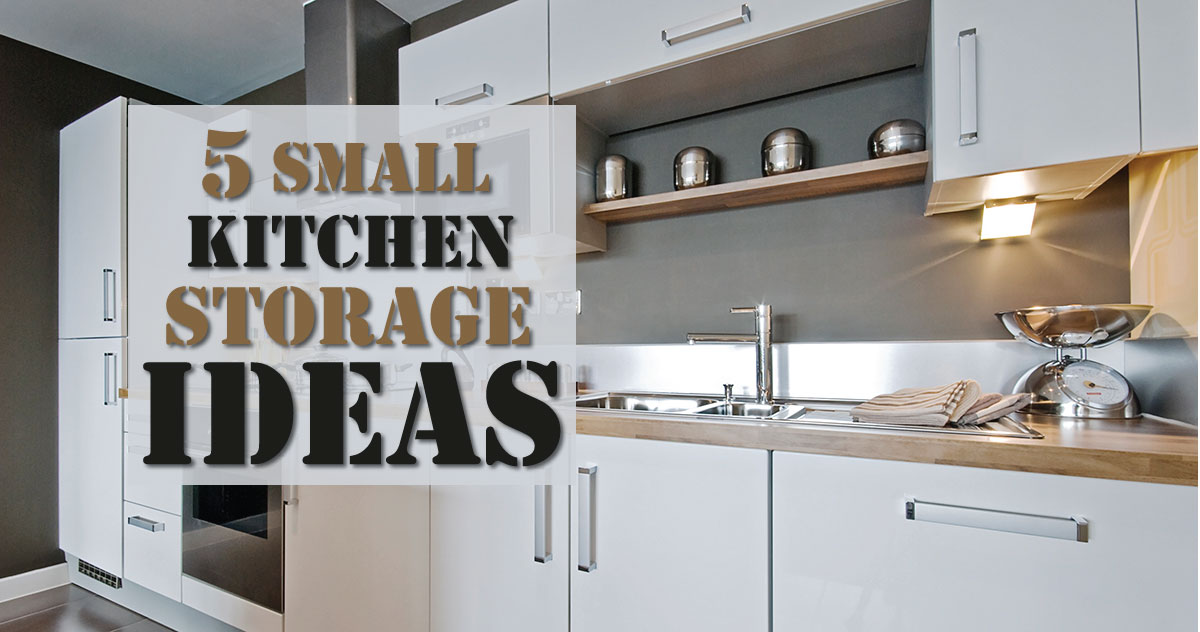
Having a small kitchen makes storing everyday kitchen items difficult. You have to get creative with the way you organize in order for it to be the most efficient and practical. Here are 5 small kitchen storage ideas to make your kitchen more functional.
You can clear out a lot of counter space if you choose to hang your pots and pans. All you have to do is mount a rack to the ceiling, add some hooks, and hang your pots and pans. It’ll add a focal point for your kitchen and save you space.
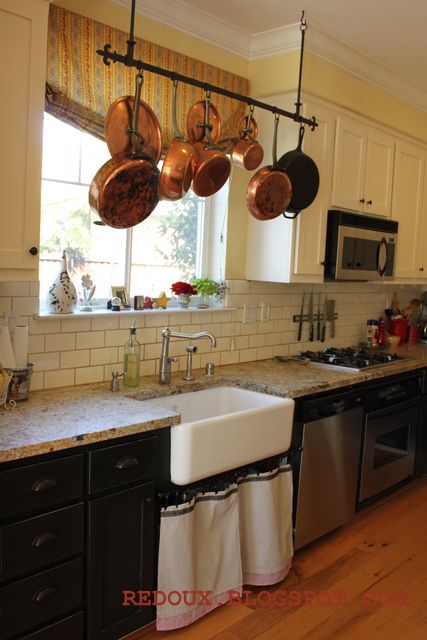
Hanging Pots and Pans
Do you have a big cabinet in your kitchen that can only hold so much before you can’t find anything you need? Well, a rollout drawer is the solution for you. By adding a rollout drawer within the cabinet, you can double the amount of storage. It can be used for lids, cooking trays, or practically anything.
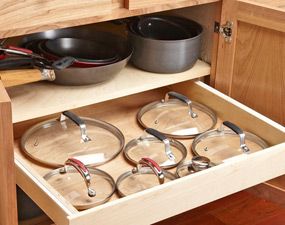
Rollout Drawer
Wall-mounted shelves not only make your kitchen feel more open but you can store everyday useful items. Since they are open, pick and choose different useful pieces such as mugs, a decorative plant, or a recipe book to fill the space. It may not look like much, but it can save you a lot of room in your cabinets, drawers, and counter. If you don’t think you have room for wall-mounted shelves, think again. They can be installed on the side of your cabinets, above the sink, in the corner, or even on your backsplash.
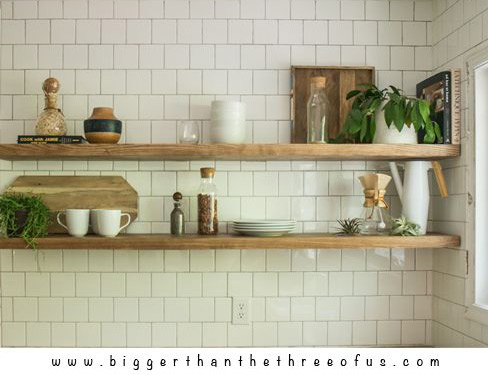
Wall mounted shelves
By installing a pull out cutting board, you can free up space in a drawer. You just need a little bit of space above a drawer or you can alter a current drawer to have a pull out cutting board above it.
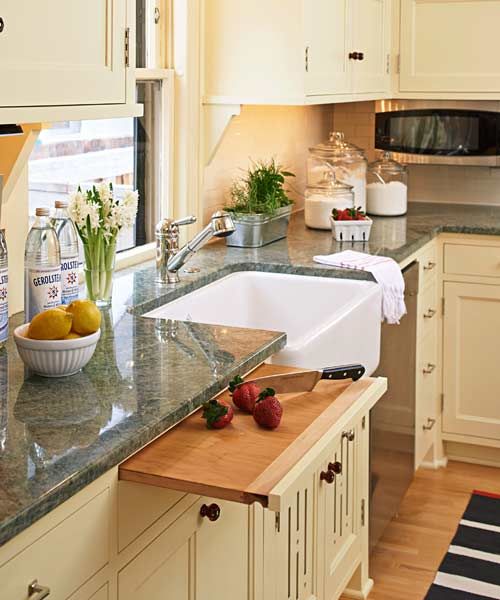
Pull Out Cutting Board
Mugs take up a lot of cabinet space, but there’s a simple solution. Add hooks to the bottom of your cabinets and hang your mugs there. You’ll open up a cabinet, and the mugs will be easy to grab when needed.
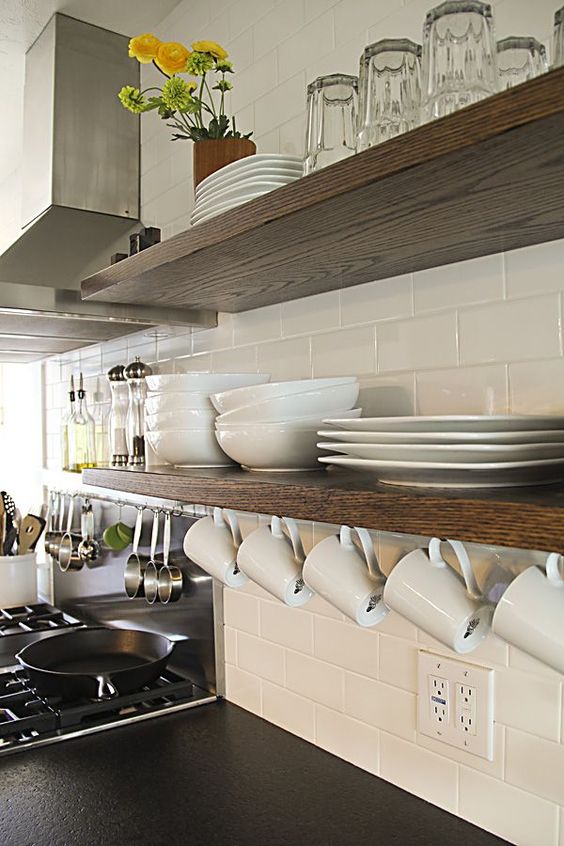
Hanging Mugs
Sound Finish Provides the highest quality cabinet coatings in the industry because cabinet coatings are our primary focus and our specialty. With 20+ years of experience, our unique system paints your kitchen cabinets in 2-3 days!
Learn more and schedule a consultation today!
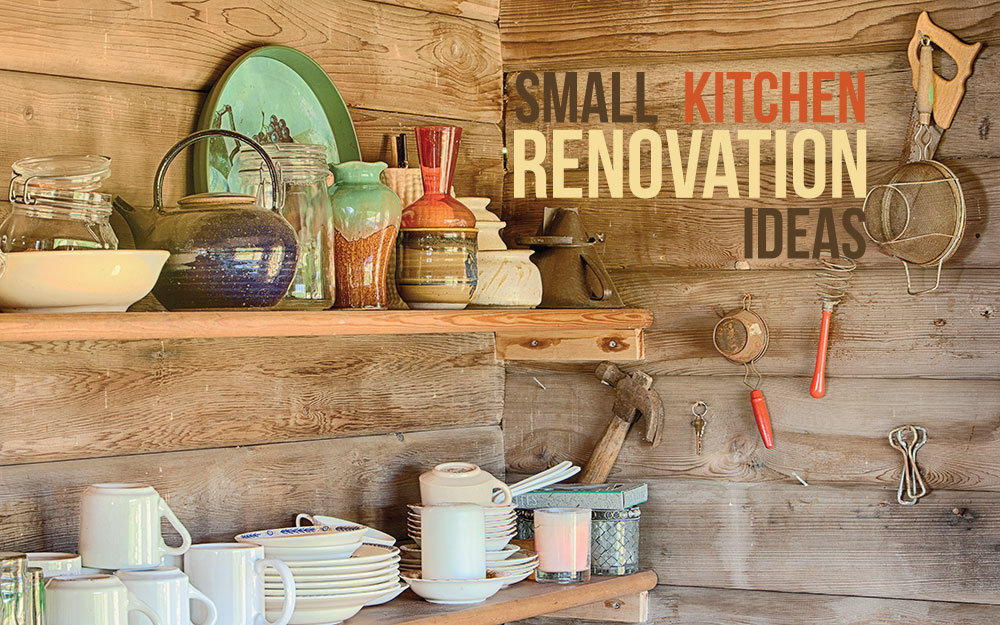
There are simple ways to renovate your small kitchen that can be done yourself. By doing them yourself, you can save a lot of money and have your kitchen as you want it. Here are some small kitchen renovation ideas that can be done in a weekend.
Changing the hardware on your cabinets is a simple project that can be done in an afternoon. New hardware can give your small kitchen a whole new look. There are a lot of different hardware styles to choose from depending on the style of your kitchen. First, you should figure out which finish goes well with your cabinets. Once that is done, you can choose a style. If you want to save even more money, you can find mismatched cabinet hardware at salvage yards or on craigslist. The don’t have to match but they do need to go well together.
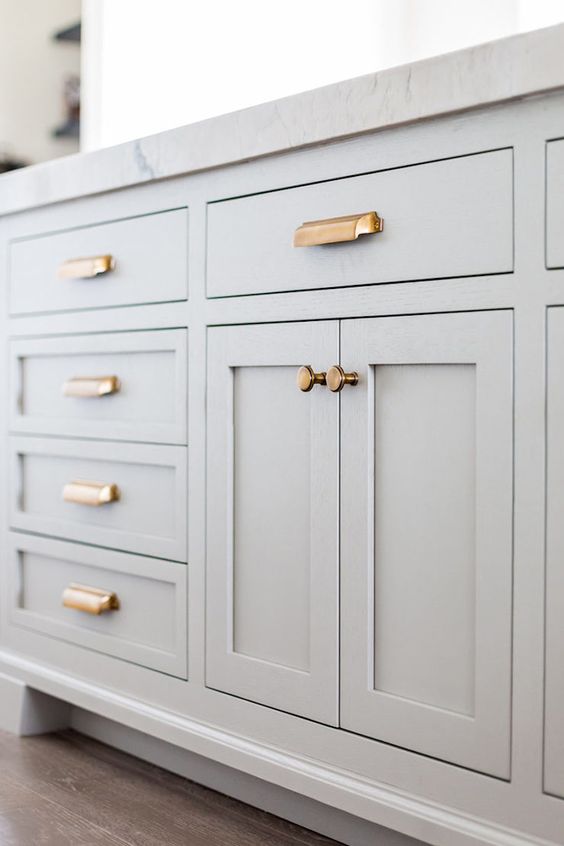
New Cabinet Hardware
There are a lot of different materials you can choose from for a kitchen backsplash. A tile backsplash is probably the most commonly chosen material. Tin-tile is becoming more and more popular as well. A white subway tile with a beveled edge is an inexpensive option. There are a number of different ways you can arrange it as well.
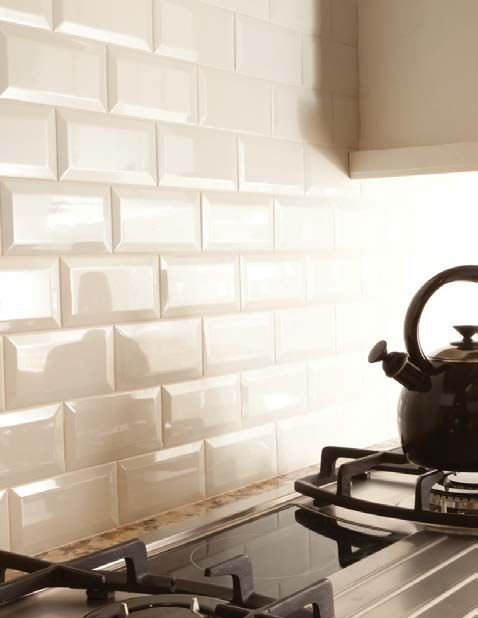
White Subway Tile With Beveled Edge
If you have space above the sink or on the side of a wall, consider building some open shelves. By having open shelves, it makes a small kitchen feel bigger because it isn’t as closed off as traditional cabinetry. You can put dishes or pitchers on these shelves and make room in your closed cabinets for other things.
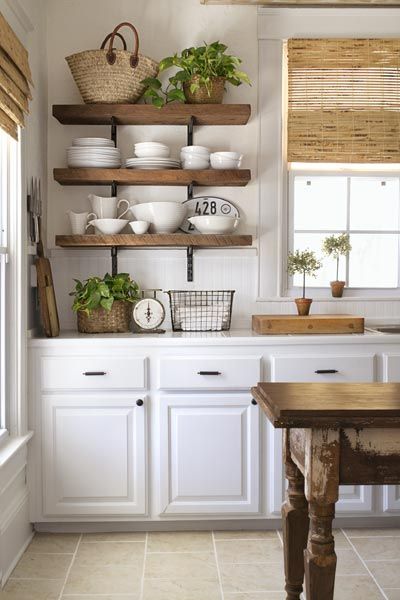
Open Shelves
Upgrading appliances is a fast and easy way to renovate your kitchen. By getting new appliances, you can make your small kitchen more energy efficient. You can also save money by installing them yourself.
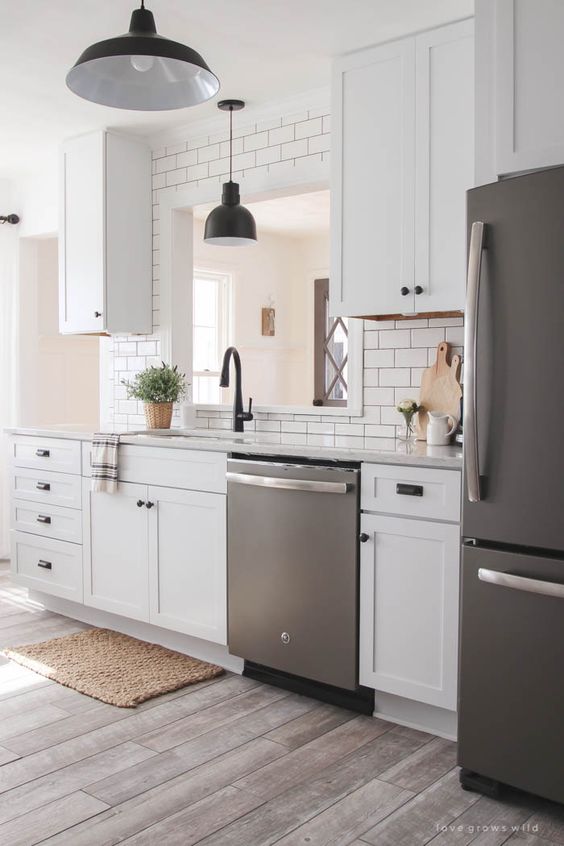
Stainless Steel Appliances
A new stainless steel sink can spruce up your kitchen. The apron-front style is a popular choice right now and it can be paired with most countertop materials.
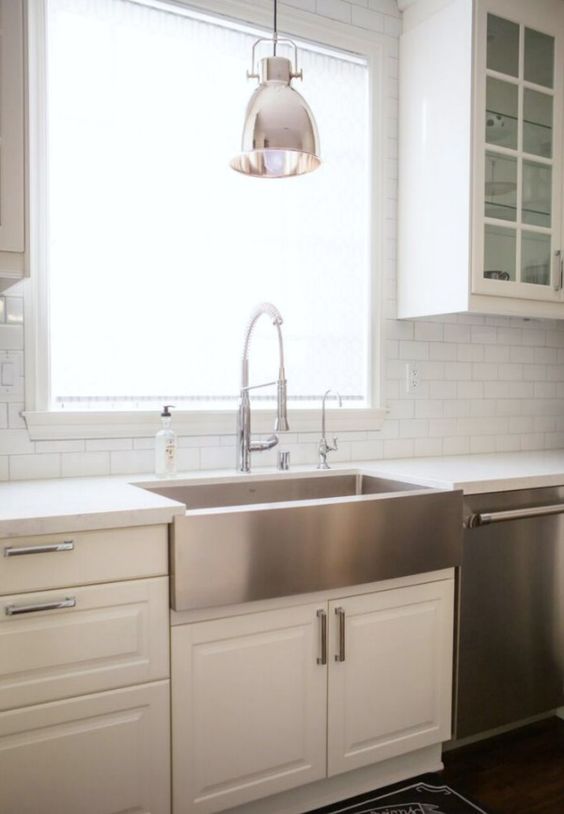
Apron Front Sink
Sound Finish Provides the highest quality cabinet coatings in the industry because cabinet coatings are our primary focus and our specialty. With 20+ years of experience, our unique system paints your kitchen cabinets in 2-3 days!
Learn more and schedule a consultation today!
Remodeling your kitchen is an expensive task. There are alternative ways to give your kitchen a facelift without breaking the bank. You can remodel your kitchen with upcycling. Here are some ways to get your kitchen remodel done yourself.
You can find old wood at a salvage yard, on craigslist, or on the side of the road. There is a lot you can do with repurposed wood to remodel your kitchen. Old wood can be turned into a countertop, a sliding door, side paneling, shelves, or a part of a structure for a bigger project.
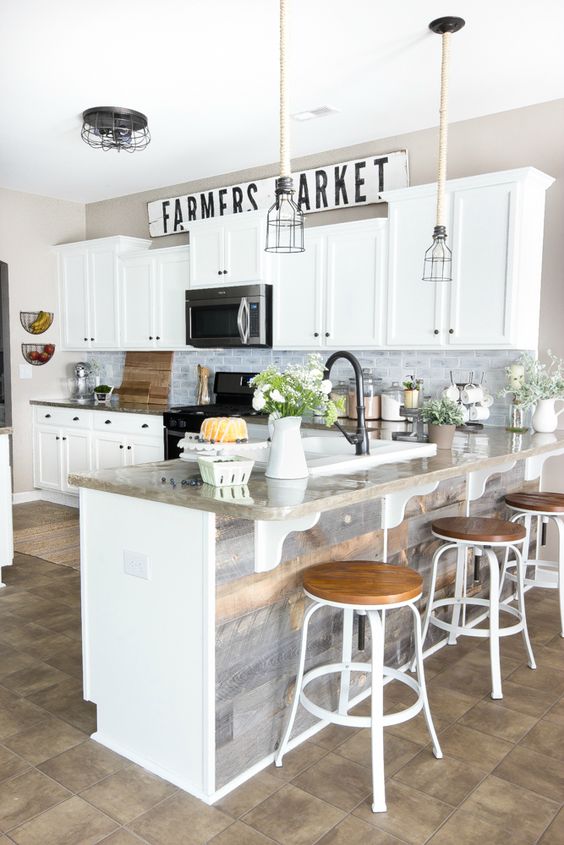
Re-purposed Wood Paneling
There are a lot of single pane windows at yard sales or in trash piles that can’t be used as windows anymore but can be upcycled. You can use it as a cabinet front or a decoration in your kitchen. You could even bring your kitchen outside by building a greenhouse to grow fresh vegetables and herbs.
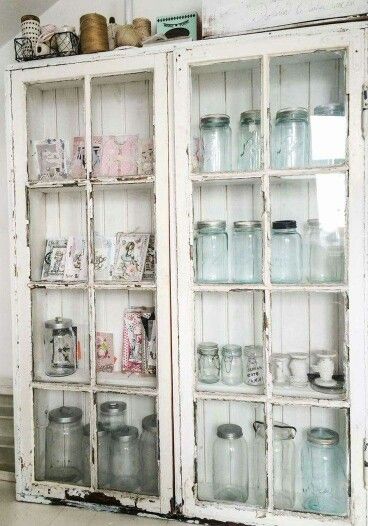
Window Pane Cabinet
If you always wanted an island in your kitchen, transform an old desk, bookshelf, or dresser into a kitchen island. All you have to do is paint it and add on a top. You can even move it to wherever you want it.
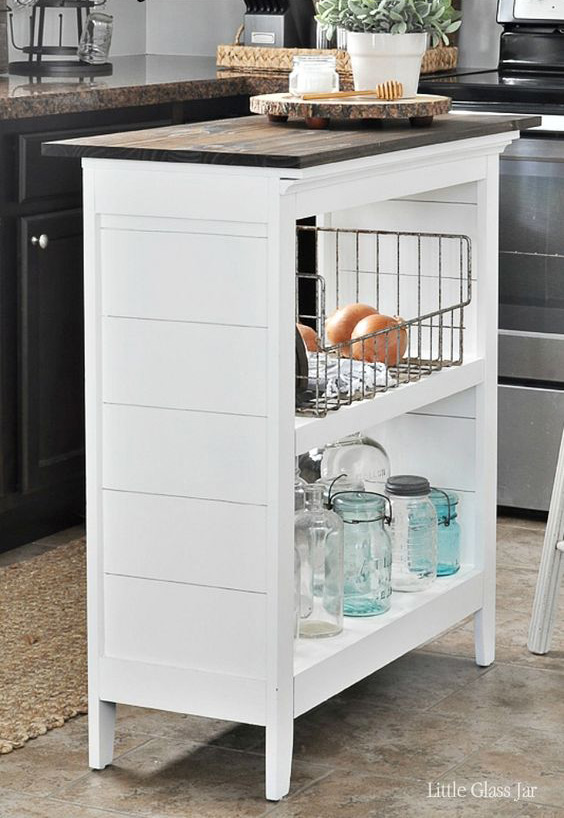
Bookshelf Kitchen Island
Concrete pots have multiple uses. They can be turned into lighting fixtures. Simply turn them upside down and hook them up to a track light system.
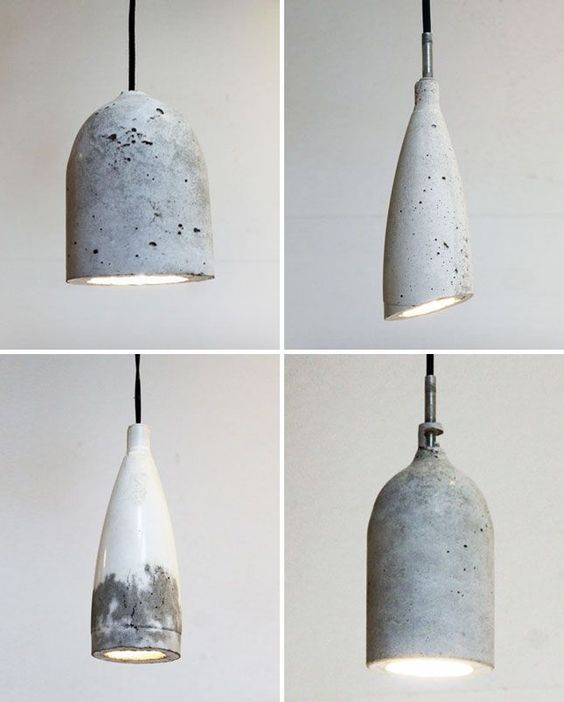
Concrete Pot Pendant Lights
If you already have old hardwood floors in your home, don’t get rid of them! They can be sanded and refinished to whatever stain you want. You can even put a wax seal on them to keep them safe from spills.
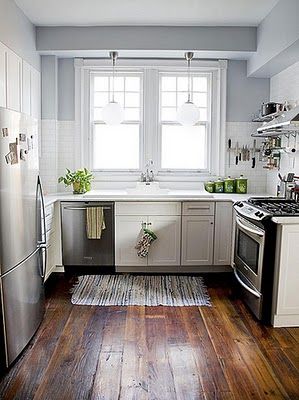
Re-stained Hardwood Floors
This project shouldn’t cost you more than $100. Replace your current backsplash with tin-tile. It comes in a variety of finishes so it can go with your kitchen, it’s easy to clean, and because it reflects light it will brighten up your kitchen.
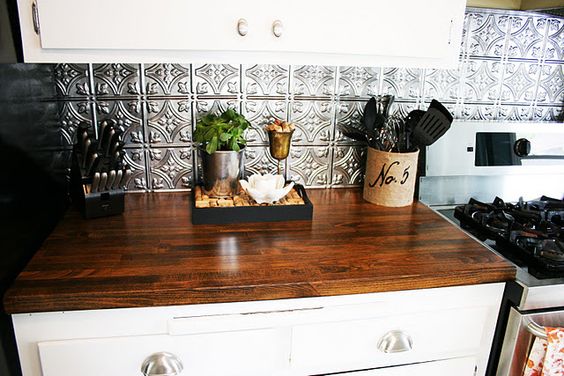
Tin Tile Backsplash
Sound Finish Provides the highest quality cabinet coatings in the industry because cabinet coatings are our primary focus and our specialty. With 20+ years of experience, our unique system paints your kitchen cabinets in 2-3 days!
Learn more and schedule a consultation today!
If you’re the type of person who never wants to throw out old items, then keep reading. There are so many practical uses for old kitchen items that can help you get organized or add decor. It’s a great way to upcycle those old materials instead of throwing them out. Here are some practical uses for old kitchen items.
Ever rummage through your spice cabinet trying to find the right spice for your recipe? It’s a constant struggle, but it doesn’t have to be. If you have old baby food jars then they can be repurposed as magnetic spice jars. Once they are magnets you can place them on the side of your fridge for easy access. It’s an easy project, although a little time-consuming. But it can be done over a long period of time if need be. Check out the tutorial!
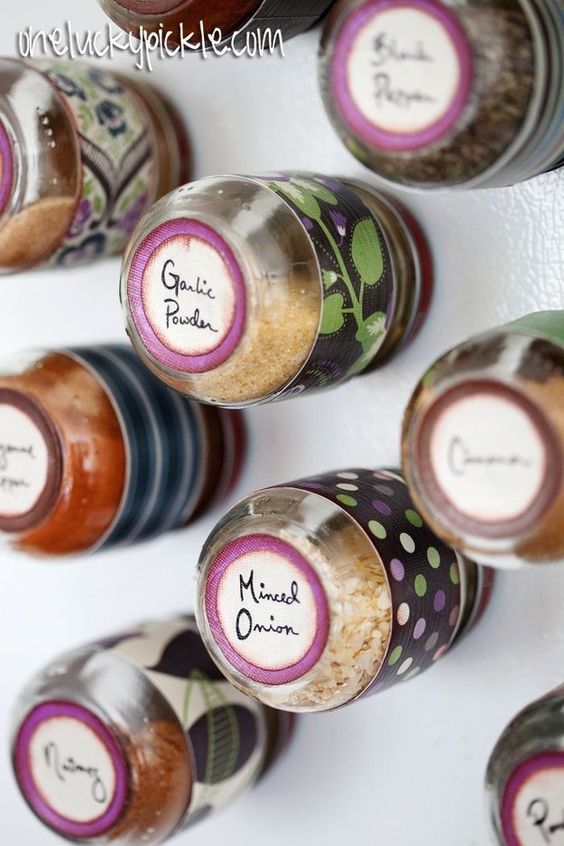
Baby Food Spice Jars
If you’ve accumulated more than enough cupcake tins then consider using one to organize your junk drawer or pantry. Separate your paper clips, tacks, keys, and post-its right inside your junk drawer. Or use the cupcake tin to organize your small baking items, such as cupcake liners, sprinkles, food coloring, and toothpicks. When it comes time to make some cupcakes, all you have to do is pull the whole cupcake tin out of the pantry.
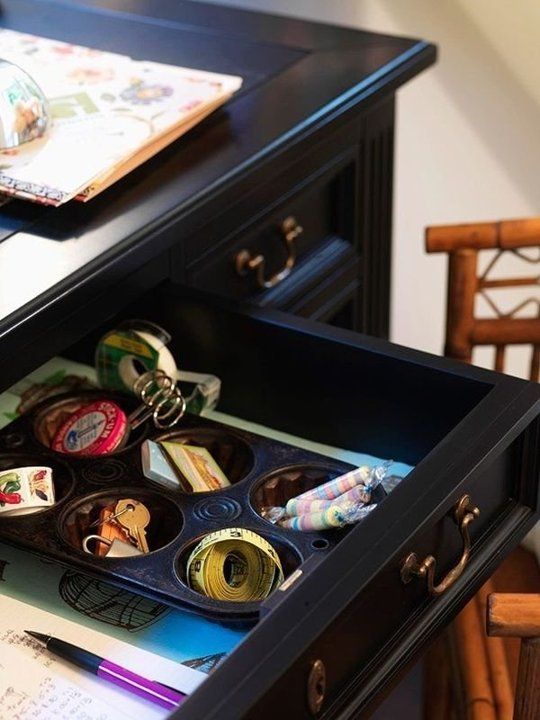
Cupcake Tin Organizer
Recipes can be some of the hardest things to organize because we keep adding more. But with a little bit of work, your recipes can be on hand for you to use instantly. First start by putting your recipes in clear plastic paper holders that have holes for binder rings. Then add binder rings to your paper towel holder and simply attach each recipe page to the binder rings. They will stand upright and you can make categories with tabs at the top of the paper. It looks nice enough to stay out on the counter and you’ll never have trouble finding a recipe again.

Re-purposed Paper Towel Holder
Throwing out your old set of dishes? Don’t – they can be used to make a bird feeder for your backyard. If you aren’t planning on getting a new dish set anytime soon, then bamboo plates could also be used. There are so many different styles and designs to choose from for this project! Check out the tutorial!

Dish Bird Feeder
Old baking pans you’re not using don’t have to go in the recycle just yet. You can repurpose an old bundt pan into a planter to hang right in your kitchen. You could paint it or keep it as is. This project is simple and can be done in an afternoon. You just need to add some holes to the sides so you can put a string or rope through it to hang it.
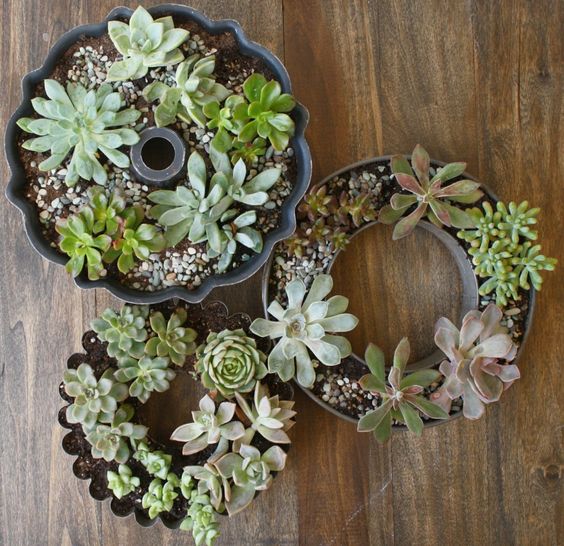
Baking Pan Planter
By using these practical uses for old kitchen items, you can get your kitchen organized or add a personal touch to your decor.
Sound Finish Provides the highest quality cabinet coatings in the industry because cabinet coatings are our primary focus and our specialty. With 20+ years of experience, our unique system paints your kitchen cabinets in 2-3 days!
Learn more and schedule a consultation today!
There are so many great ways to organize your kitchen by using items that you already own. Not only do you save money, but you can be proud of the practical things you created out of objects that most people would throw out. The kitchen is usually the business room in a house, making it necessary for it to be organized. Here are a few ways to organize your kitchen with upcycling.
Do you ever sit down to make your dinner menu for the week and by the time dinner comes around you forgot what you were supposed to make? This old shutter menu will solve your problem. By using an old shutter, painting it, and attaching a chalkboard to it, you can have your weekly menu hanging on the wall. You could even attach hooks to the bottom of it to hold pot holders or aprons.
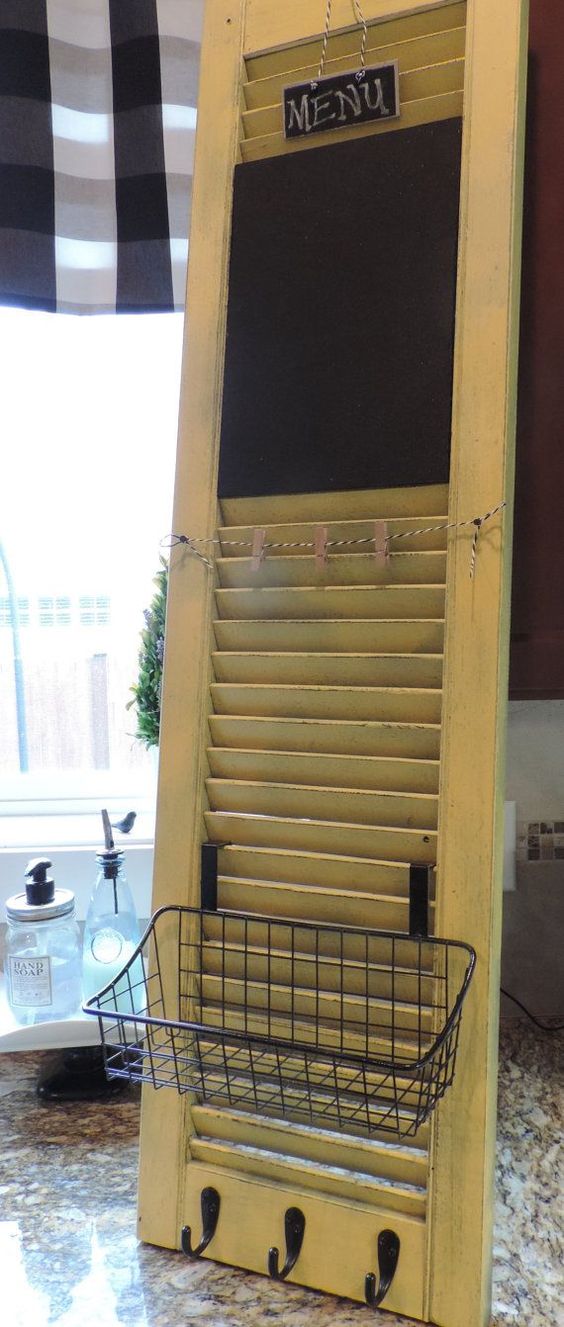
Old Shutter Menu
Don’t have an island in your kitchen? Now you can. Turn an old dresser or desk into a kitchen island by painting it and adding a wooden top to it. You’ll have drawers for extra storage and you can move it wherever it needs to go.
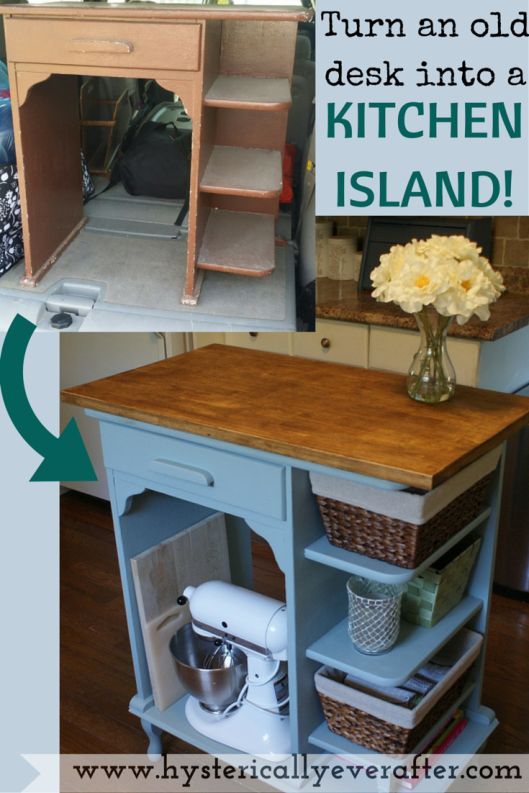
Desk Kitchen Island
This is an easy one you can complete in an afternoon. Use the head of an old rake as a kitchen utensils hanger. It can be used to hang up your big spoons, whisks, and spatulas. It goes well in a country kitchen or a cottage kitchen design.
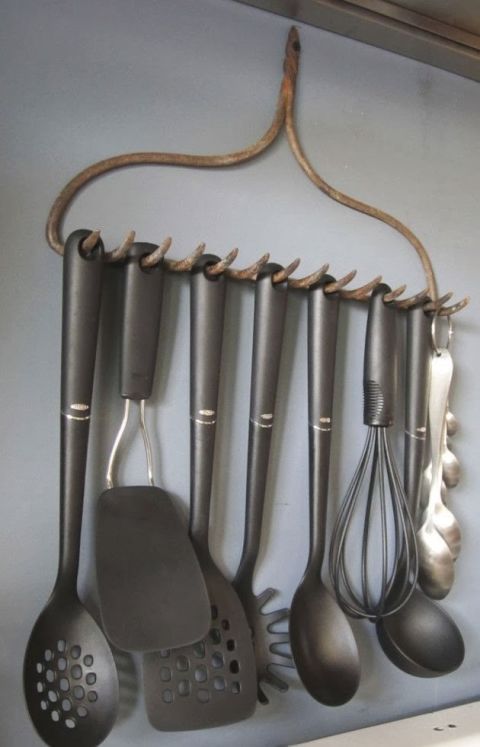
Rake Hanger
You know those glass jar canisters used to store food that cost a fortune? Well, you can make them with an old salsa jar, a drawer knob, paint, and a hot glue gun. Simply soak the jar in hot water and soap to get all the paper off, paint the lid, and attach the drawer knob to the top of the lid with the hot glue gun. You can fill them with coffee, sugar, flour, etc and display them on your counter, making space in your pantry.
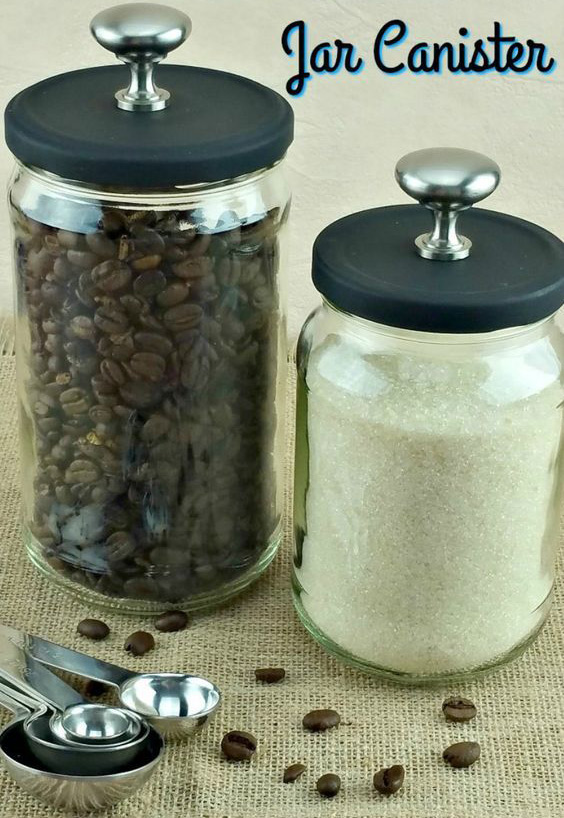
Jar Canister
File holders can be used to hold your saran wrap, foil, wax paper, vegetables, and cans of food. Who knew file holders could be used for so much? They hold much more than just files. Just set it on the counter or attach to the inside of a cabinet door and it’s done. Moving these items over to the file holder will open up almost an entire drawer and a lot of pantry space.
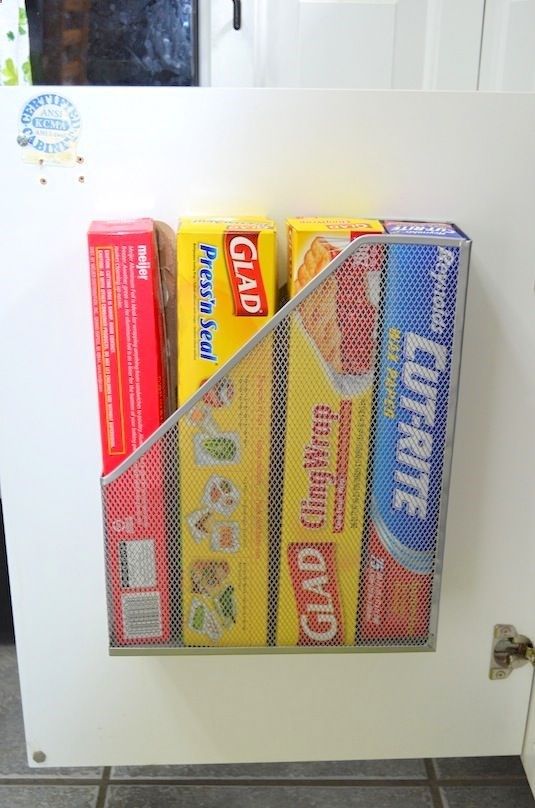
File Holder Organizer
Sound Finish Provides the highest quality cabinet coatings in the industry because cabinet coatings are our primary focus and our specialty. With 20+ years of experience, our unique system paints your kitchen cabinets in 2-3 days!
Learn more and schedule a consultation today!
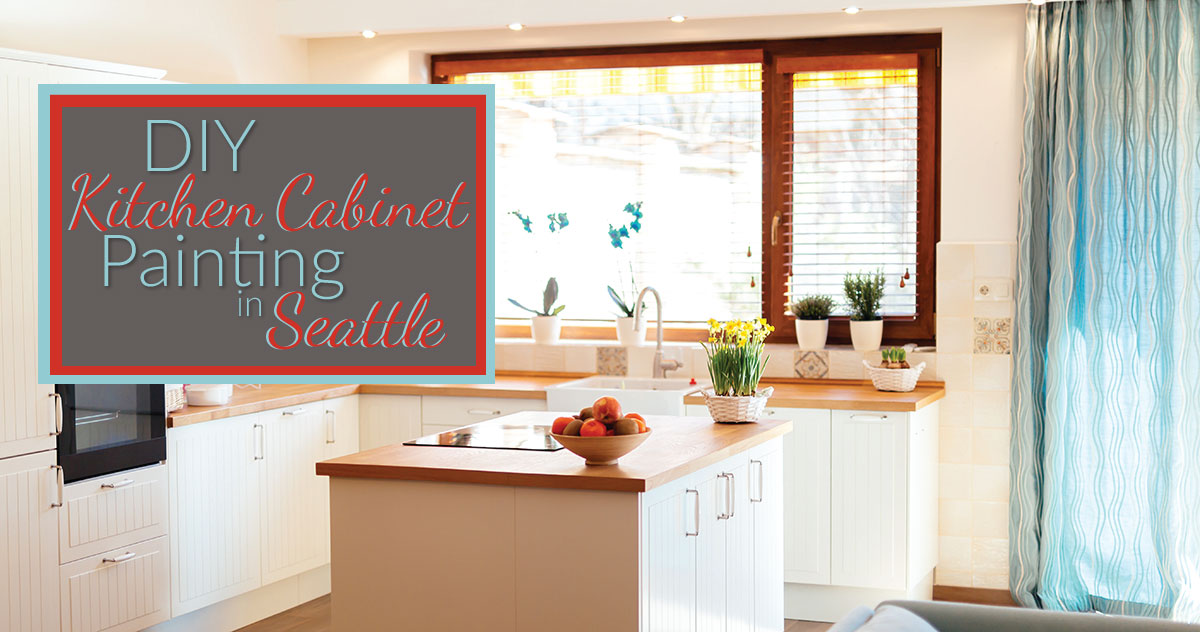
DIY kitchen cabinet painting in Seattle is a great way to save money, but it is also a lot of time and hard work. In order to be able to completely do it yourself, you have to know the tricks, expert tips, techniques, and know which types of paint work best. In the end, you never know how it’s going to turn out, making it a pretty big risk. There are so many DIY posts out there giving you instructions on how to paint your kitchen cabinets so they look professional. But unless you have some serious painting skills, professional painting tools, and lots of time on your hands, they won’t turn out as good as you had hoped. Sound Finish has come up with a win-win solution for the budget conscious novice. It’s called DIT (Do-It-Together). It’s a DIY kitchen cabinet painting option in Seattle that leaves the most difficult portion of the work to us professionals while saving half the cost on professionally painted kitchen cabinets. The best part is, we do 90% of the work because we paint your cabinet doors (the part of the cabinet everyone sees) for you.
You choose your own paint color for your cabinets. However, Sound Finish will recommend the correct brand of paint and where to purchase it. By doing this, we can offer a discount so you will be getting premium quality paint at a lower price.
Schedule a time for Sound Finish to come pick up your door and drawer fronts before you begin removing them. Sound Finish will give you access to a tutorial video on how to remove your cabinets doors and drawer fronts. NOTE: Please ensure that all pieces are removed and properly labeled before our arrival.
Sound Finish will come pick up your cabinet doors and drawer fronts at the scheduled time. We will also take with us one gallon of the paint that you have purchased. This is to ensure that we are using the exact same paint and color. On the date of pick up you will be given access to our series of tutorial videos showing you how to complete your project. There is no need to remove dishes or empty the drawers and cabinets. Simply follow the process that Sound Finish has provided for you via our tutorial videos.
Most people can only paint on the weekends, so we’ll allow enough time to paint your cabinet boxes. Don’t worry! We will provide you with a high-quality series of videos that show you exactly how to tackle each step of the process. Plus, we can even provide you with a 5-Gallon Bucket filled with every single tool you will need to get the job done. (Ask about our Optional Cleaning Kit!) That’s what D-I-T means; we really are going to partner with you and Do It Together. The whole process should take about two weeks. Did we mention that we’ll be doing 90% of the work?
After two weeks, Sound Finish will return your completed items to you. At the time of delivery, we will go through and inspect them with you to ensure nothing was damaged in transit. Afterwards, simply follow our tutorial video on how to reinstall your doors and drawer fronts.
Sound Finish Provides the highest quality cabinet coatings in the industry because cabinet coatings are our primary focus and our specialty. With 20+ years of experience, our unique system paints your kitchen cabinets in 2-3 days!
Learn more and schedule a consultation today!
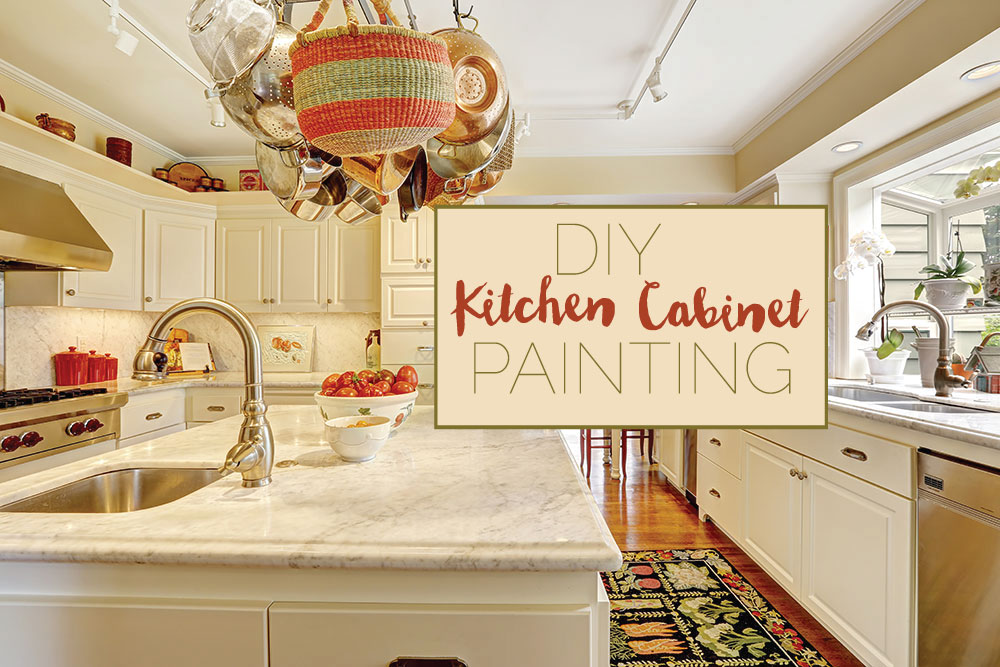
DIY kitchen cabinet painting is a great way to save money, but it is also a lot of time and hard work. In order to be able to completely do it yourself, you have to know the tricks, expert tips, techniques, and know which types of paint work best. In the end, you never know how it’s going to turn out, making it a pretty big risk. There are so many DIY posts out there giving you instructions on how to paint your kitchen cabinets so they look professional. But unless you have some serious painting skills, professional painting tools, and lots of time on your hands, they won’t turn out as good as you had hoped. So now you need some DIY painting options to help you out. Sound Finish has come up with a win-win solution for the budget conscious novice. It’s called DIT (Do-It-Together). It’s a DIY kitchen cabinet painting option that leaves the most difficult portion of the work to us professionals while saving half the cost on professionally painted kitchen cabinets. The best part is, we do 90% of the work because we paint your cabinet doors (the part of the cabinet everyone sees) for you.
You choose your own paint color for your cabinets. However, Sound Finish will recommend the correct brand of paint and where to purchase it. By doing this, we can offer a discount so you will be getting premium quality paint at a lower price.
Schedule a time for Sound Finish to come pick up your door and drawer fronts before you begin removing them. Sound Finish will give you access to a tutorial video on how to remove your cabinets doors and drawer fronts. NOTE: Please ensure that all pieces are removed and properly labeled before our arrival.
Sound Finish will come pick up your cabinet doors and drawer fronts at the scheduled time. We will also take with us one gallon of the paint that you have purchased. This is to ensure that we are using the exact same paint and color. On the date of pick up you will be given access to our series of tutorial videos showing you how to complete your project. There is no need to remove dishes or empty the drawers and cabinets. Simply follow the process that Sound Finish has provided for you via our tutorial videos.
Most people can only paint on the weekends, so we’ll allow enough time to paint your cabinet boxes. Don’t worry! We will provide you with a high-quality series of videos that show you exactly how to tackle each step of the process. Plus, we can even provide you with a 5-Gallon Bucket filled with every single tool you will need to get the job done. (Ask about our Optional Cleaning Kit!) That’s what D-I-T means; we really are going to partner with you and Do It Together. The whole process should take about two weeks. Did we mention that we’ll be doing 90% of the work?
After two weeks, Sound Finish will return your completed items to you. At the time of delivery, we will go through and inspect them with you to ensure nothing was damaged in transit. Afterwards, simply follow our tutorial video on how to reinstall your doors and drawer fronts.
Sound Finish Provides the highest quality cabinet coatings in the industry because cabinet coatings are our primary focus and our specialty. With 20+ years of experience, our unique system paints your kitchen cabinets in 3-4 days!
Learn more and schedule a consultation today!