- Home
- Cabinet Refinishing
- Cabinet Painting
- Before & After
- DIT Cabinet Painting
- About Us
- Blog
- Contact
- Lewiston, ID Cabinet Refinishing
- Moscow, ID Cabinet Refinishing
- Orofino, ID Cabinet Refinishing
- Grangeville, ID Cabinet Refinishing
- Kamiah, ID Cabinet Refinishing
- Post Falls, ID Cabinet Refinishing
- Coeur d’Alene, ID Cabinet Refinishing
- Sand Point, ID Cabinet Refinishing
- Riggins, ID Cabinet Refinishing
- McCall, ID Cabinet Refinishing



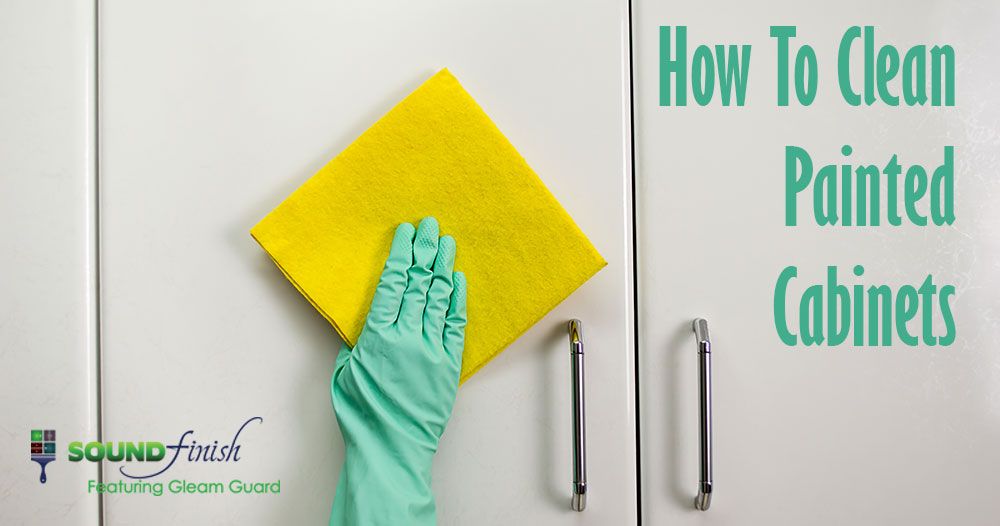
After investing in cabinet painting, it would make sense to want the results and finish to last as long as possible. To do this, it’s important to follow these simple cleaning tips to keep your painted cabinets looking brand new for years to come.
Use Warm Water to Wash Painted Cabinets
One of the main form of damage that happens to painted cabinets is scuff and scratch marks, or thin patches caused by heavy scrubbing. Warm water will help ease off the dirt more efficiently. Avoid overly hot water, however, and try to not soak or get the cabinet excessively wet, as this can cause paint to bubble or peel. Use a soft cleaning surface, such as rag, washcloth, or soft side of a sponge (never a scrubbing pad)
White Vinegar Works Wonders
White vinegar make a great gentle-yet-effective cleaner for painted cabinets, and is something most people already have in their kitchen. If water by itself isn’t getting all of the dirt off, dilute some white vinegar in your bucket of warm water and give that a go.
Avoid Abrasive Cleaners
A sure-fire way to damage your cabinets is to use a harsh, abrasive cleaner or scrub brush. If you have stubborn, stuck-on dirt that warm water and vinegar can’t budge, make a past out of baking soda and warm water, and use a washcloth, not a harsh sponge or scrub pad to gently work the dirt off.
Clean up Messes as Soon as They Happen
And lastly, the most efficient way to keep your cabinets clean and in great shape for years is to not allow dirt to get stuck on in the first place. As soon as you notice a mess has occurred, use a wet rag or washcloth to clean it up. This way, you won’t have to scrub hard later and risk doing damage your cabinets.
Sound Finish Professional Cabinet Painting and Refinishing Services
Sound Finish Provides the highest quality cabinet coatings in the industry because cabinet coatings are our primary focus and our specialty. With 20+ years of experience, our unique system paints your kitchen cabinets in 2-3 days!
Learn more and schedule a consultation today!

Selling your home in winter can be challenging, but comes with its own rewards. During winter, there are fewer homes on the market, meaning less competition and higher demand for the homes that are available.
Winter Home Staging Tips:
- Take care of ice and snow: keep your driveway, pathways, patios, decks, and steps to your home shoveled, and sprinkle ice melting salt to prevent ice from forming.
- Keep the roof clear of ice dams. While icicles can look appealing during winter, ice buildup around gutters can indicate a more serious underlying problem leading to water damage.
- Display photos of the exterior of your home (including the yard, garden, and patio or deck) from spring, summer, and fall, so that viewers can get a feel for the year-round look of your home.
- Turn your thermostat up a few degrees to keep potential buyers comfortable. Feeling cold while viewing a home is an extreme turn-off for buyers.
- It gets dark very early during the winter months- combat this by putting outdoor lights on timers so people driving by can easily see your home, and so that potential buyers never arrive to a showing in the dark.
- Put a welcome mat at your front door. This not only looks inviting, but will help prevent snow and mud from being tracked inside. Additionally, consider asking viewers to remove their shoes upon entering. This will not only keep floors clean, but show that you take pride in your home.
- Highlight any features of your home that are especially useful in winter. If you have an attached garage, new furnace or water heater, working fireplace, now is the time to show them off.
- Take advantage of the holidays, but keep decor simple and not overbearing. Hang a wreath on the door and hang up some lights outside. Inside, set up a tree as long as it doesn’t make the room feel cluttered, and set the dining room table as if for a festive holiday party.
Sound Finish Professional Cabinet Painting and Refinishing Services
Sound Finish Provides the highest quality cabinet coatings in the industry because cabinet coatings are our primary focus and our specialty. With 20+ years of experience, our unique system paints your kitchen cabinets in 2-3 days!
Learn more and schedule a consultation today!
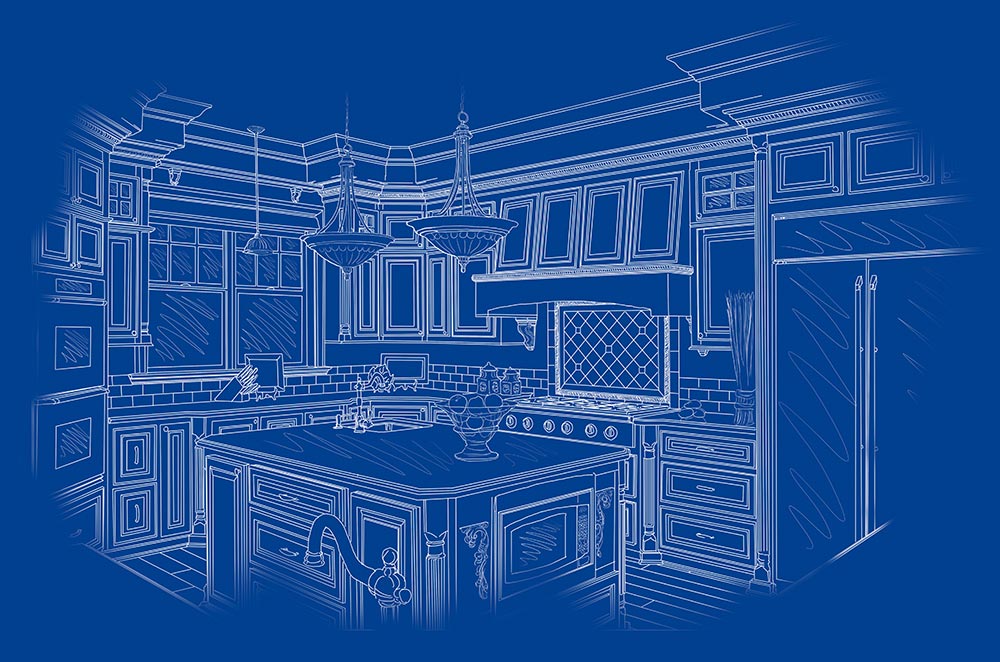
The kitchen is the heart of the home, and arguably the room that sees the most action, from cooking everyday meals, to hosting guests, to prepping for large parties, to a small sit-down over coffee. As such, the kitchen is a place that needs to be both attractive and functional. This raises a whole host of do’s and dont’s when it comes to kitchen design. Experts bring up 10 mistakes you should avoid in order to have a kitchen that not only looks great, but is practical for your needs.
1. Don’t obstruct access to the kitchen triangle.
The “Kitchen Triangle” refers to the paths between the sink, stove, and refrigerator. It’s the area of greatest activity in the kitchen, and requires careful planning and unobstructed access. For example, imagine how frustrating it would be to have a kitchen island between the stove and the sink. In order to do something like draining pasta, you would need to walk all the way around, while carrying a hot and potentially heavy pot.
Regardless of kitchen size or layout, the sum of all the sides of the kitchen triangle should not be larger than 25 feet, but at the same time it should not be less than 10 feet. If the kitchen triangle is too small, people will be tripping over each other and it will be difficult to find prep space, and if the triangle is too large, cooking meals could be a very tiring task.
2. Don’t waste storage space in the kitchen.
Kitchens contain lots of stuff. On top of that, kitchen appliances are often oddly shaped and take up a lot of space, such as coffee makers, stand mixers, or food processors. Finding a home for all your stuff while keeping the kitchen uncluttered can be difficult. Because the overall size of the space you’re working with may be limited, one of the biggest design mistakes you could make is not including enough storage, or not using existing storage space to it’s greatest potential.
Almost every kitchen design has wasted space, however this can be lessened with adequate planning and forethought. If your cabinets have a built-in wine rack, but you don’t see yourself filling it up, consider taking out the grid work and re-purposing the space as an additional cupboard by adding on a cabinet door. Also remember to always install cabinets over the refrigerator. While this area can be difficult to reach, it makes a great potential storage space for large or seasonal kitchen items, such as a roasting pan that may only be used during the holidays.
3. Don’t crowd countertop workspaces.
One of the biggest complaints about kitchen design is a lack of useable countertops. Consider all the basic kitchen activities that require a countertop, as well as appliances that are permanently located there. Some ways to free up additional workspace is to add an island or breakfast bar to an L-shaped kitchen, if the space allows, or to re-arrange the contents of your cabinets to allow for storage of lesser-used appliances that may be taking up valuable space.
4. Don’t deal with poor lighting.
In the kitchen, proper lighting lighting is not only a matter of design, but it’s also a safety matter when it comes to handling sharp utensils or hot kitchenware. Evaluate your work areas and determine if each spot has the light it needs. Another great idea is to install under-cabinet lighting as an additional way to ensure that the counters have sufficient lighting for common kitchen tasks.
5. Don’t make your kitchen design too trendy.
Jumping on the latest trends may not necessarily be a mistake, but you should always take caution when choosing the latest kitchen designs or picking out the latest and greatest high-end equipment. This season’s top color or trendy design may be out-of date within just a few short years, and you may never see a return on investment when buying the latest kitchenware, not to mention the fact that by this time next year, a newer, better gadget will have come out.
6. Don’t avoid professionals.
Attempting to take on a kitchen design project by yourself to save money is a common mistake that can often waste money, time, and energy in the end. There are some jobs where, for safety and quality work, it is worth it to hire a professional so that the job is done right, the first time.
Sound Finish Professional Cabinet Painting and Refinishing Services
Sound Finish Provides the highest quality cabinet coatings in the industry because cabinet coatings are our primary focus and our specialty. With 20+ years of experience, our unique system paints your kitchen cabinets in 2-3 days!
Learn more and schedule a consultation today!
When you are selling your home, or just planning on making some updates, it’s important to put your money to its best use. To do so, there are five top home improvement projects that experts say will provide the most return on investment when you want to improve your home’s value:
- Kitchen Updates
- Bathroom Updates
- Exterior Updates
- Interior Paint and Moulding
- Landscaping
Kitchen Updates
There’s little disagreement that kitchen updates are the most important upgrades you can make, ROI-wise, to improve your home’s value. The kitchen is the heart and epicenter of the home, and is often the one most scrutinized by buyers. Some great ways to update your kitchen are through putting in new appliances, painting the cabinets (or refinishing them), and updating the lighting.
Bathroom Updates
The bathroom is often overlooked when it comes to home improvement, but can actually make a large difference in your home’s value. Consider these tips to making a small bathroom look and feel larger for inspiration. Other great improvement projects include installing a new, high-efficiency toilet that uses less water per flush, as well as new faucets and shower heads.
Exterior Updates
One of the worst mistakes you could make when preparing your home for sale is ignoring the exterior. First impressions matter greatly, and peeling paint, broken siding, and missing shingles on the roof can give off the impression that the rest of the home hasn’t been maintained, and may be falling apart on both the inside and the outside. Replace any broken or damaged siding, consider painting the exterior if existing paint is peeling or faded, and make sure the roof is clear of any debris or leaks.
Interior Paint and Moulding
This is one of the most well known tips for home sellers: paint the walls. And it’s well known for a reason- having the walls painted in neutral colors is one of the least expensive ways to improve your home’s value. Another great addition to this tip is to add in crown moulding or other trim to add more visual interest to the walls.
Landscaping
Again, first impressions count! Make sure your landscaping is up-to-snuff and that your front and back yards are clear of weeds, leaves, and debris. Add in mulching, a new garden, or even some container plants. In addition, clean off any outdoor furniture and ensure that any outdoor living spaces look inviting. Consider buying new outdoor furniture, especially if current pieces are old, worn, and damaged, or liven up what you currently own by adding a new outdoor table, colorful outdoor throw pillows, potted plants, or other decor. Additionally, make any needed repairs to your deck, porch, and/or fence.
Sound Finish Professional Cabinet Painting and Refinishing Services
Sound Finish Provides the highest quality cabinet coatings in the industry because cabinet coatings are our primary focus and our specialty. With 20+ years of experience, our unique system paints your kitchen cabinets in 2-3 days!
Learn more and schedule a consultation today!
While it would be nice to have a large, spacious bathroom, in some circumstances you just have to work with the space you have available. Decorating and designing around a small bathroom space can be difficult, however there are a few tried and true methods that you can employ to make your small bathroom look and feel larger.
Light Colors Make a Bathroom Feel Spacious
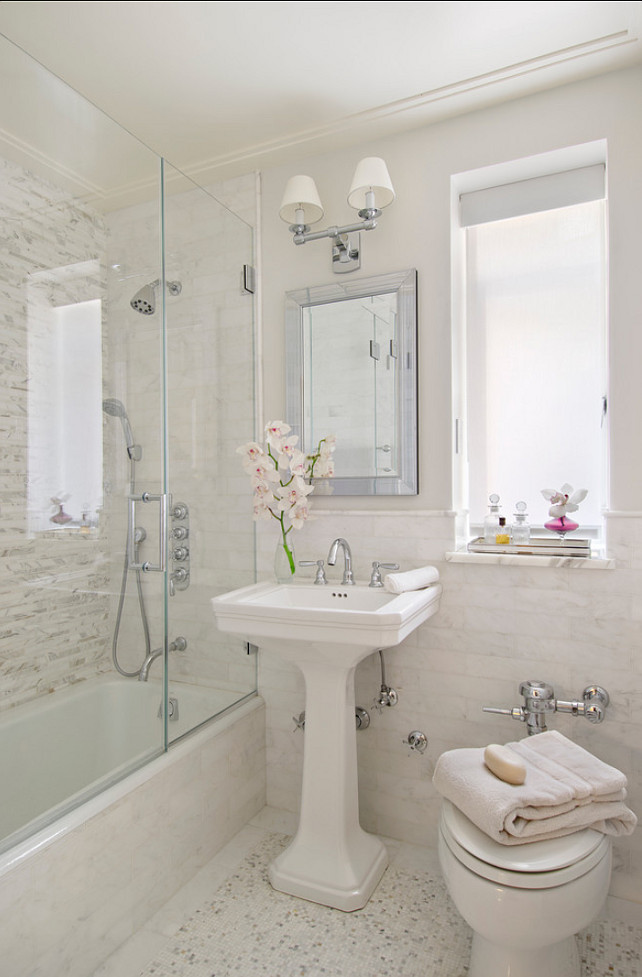
Chances are, you already know of this design rule: Painting a room with light colors can make a room look larger than it really is by reflecting more natural and artificial light. Light colors also have an additional benefit in that they will make your bathroom look cleaner. Light blues and whites are an extremely popular combination for use in a bathroom, but you could also branch out and use greys, greens, creams, or any other light color.
Minimize Contrast
Tying in with the rule of thumb for using lighter colors, you can also make a bathroom appear larger by keeping everything within a similar range of hue and value. For example, don’t have a light colored ceiling and dark colored walls, or vice versa. The same applies for any surface in your bathroom- walls, ceiling, trim, tile, counter, etc. There are a few exceptions to this rule, however, if you do want some contrast: limit any dark colors to a feature that stands out from the wall, such as a light fixture, open shelves, or a low cabinet. This will provide you with a nice pop of contrast, while visually giving the illusion that those objects are receding back into the wall.
Make the Most of Mirrors in the Bathroom
 Featuring large mirrors in your bathroom design is an excellent way to give the illusion of more space. If your bathroom features two sinks, don’t make the mistake of hanging two individual mirrors above each one. While this design may work great in a large bathroom, in a smaller bathroom it will only break up the visual space and can actually make the room appear smaller. For bathroom mirrors, the bigger the better- install a mirror that stretches the entire width of the counter and, if possible, reaches all the way up to the ceiling.
Blend Bathroom Tile Color and Wall Color
In bathrooms that feature tile in the shower or bathtub area, many people make the mistake of using tile colors that are radically different from the rest of the walls in the bathroom. Making this mistake visually divides up the room, and can make it feel drastically smaller. Create flow and unify your space by matching your tile color and wall color.
Sound Finish Professional Cabinet Painting and Refinishing Services
Sound Finish Provides the highest quality cabinet coatings in the industry because cabinet coatings are our primary focus and our specialty. With 20+ years of experience, our unique system paints your kitchen cabinets in 2-3 days!
Learn more and schedule a consultation today!
Choosing paint colors is a time-consuming and sometimes frustrating process. There are so many shades to choose from, and it can be difficult to know what colors look good together, and which ones clash. Fortunately, there are some great resources available to find the best color palette for your kitchen. Here’s a tried-and-true method to not only find a base color scheme, but visualize how it will look in your kitchen.
Step 1: Find Colors You Enjoy From What’s Already In Your Kitchen
A great way to simplify the color finding process is to work with what you have. Select a “feature” item (or set of items) in your kitchen that you are planning on keeping the way they are. For example, a bold set of matching Fiestaware dishes, custom upholstered dining room chairs, the color of a standing bowl mixer, a set of curtains you love, or just a particular piece of decor.
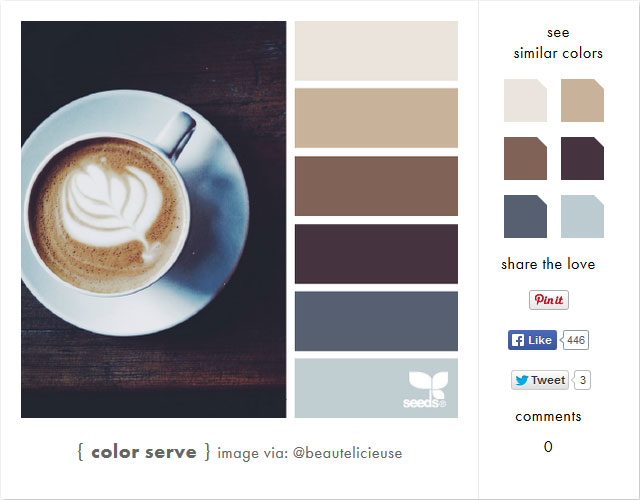
Once you have your item picked out, head on over to a color scheme inspiration site- Design Seeds is a popular choice. By using their Palette Search function, you can play around with the sliders to find a match to your key item or items. Tinker around with it- it may take a bit of experimenting to get just the right match. Then, hit “Go get it!” and the site will churn out multiple pallets featuring the color you’ve selected. If only a few results showed up, or you don’t like the results shown, adjust a few of the sliders up or down, and try again. Small differences in the color selected will result in different color palettes being shown. Alternatively, you can also select from various color palette “themes”, many of which can prove suitable for a kitchen. We strongly recommend checking out the “rustic”, “market hues”, and “edible hues” themes for palettes that may work well in a kitchen. Here’s an example of a color pallet we found in the “edible hues” theme:
Step 2: Preview The Colors In Your Kitchen
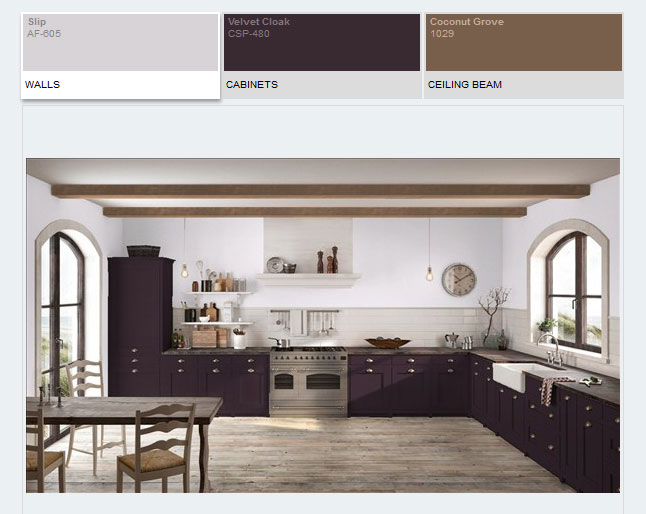
After you’ve picked out a few color palettes you enjoy, the next step is to head over to a painting preview tool. Most paint manufacturers offer some type of paint preview tool, and many of them allow you to upload a picture of your own kitchen. For the following example, we used Benjamin Moore’s Personal Color Viewer with one of their preset kitchen models, and found it relatively easy to use. Next, experiment with your palette and see which colors look best where. Keep in mind that an abundance of darker colors can make a room appear smaller, so in general you will want to avoid darker walls or ceilings. Have fun with it! Going off of the above color scheme, here is the sample kitchen we came up with:
Sound Finish Professional Cabinet Painting and Refinishing Services
Sound Finish Provides the highest quality cabinet coatings in the industry because cabinet coatings are our primary focus and our specialty. With 20+ years of experience, our unique system paints your kitchen cabinets in 2-3 days!
Learn more and schedule a consultation today!
Listing a home before it’s ready for sale can be a costly mistake. A home that is properly prepped for sale will not only be sold quicker, but can easily gain a higher asking price. Luckily, there are many things you can do to get your home market ready that cost little to nothing.
Step 1: A Clean House is a Sold House
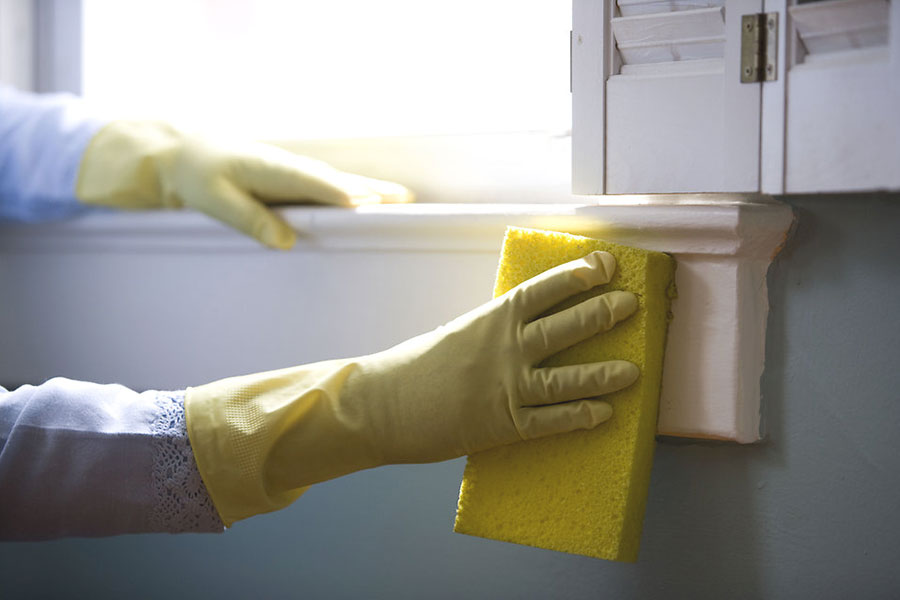
When a potential buyer walks into a clean, immaculate home, they will easily get the impression that the house has been well maintained and cared for. It’s a major benefit for buyers when a home is move-in ready, and not a project home that will need fixing up here and there, and they will be more willing to pay a higher asking price. Thoroughly cleaning will also help eliminate any unwanted odors- a huge turn-off to buyers.
Here’s a list of cleaning tasks that are often overlooked:
- Vacuum daily
- Clean out cobwebs- using a vacuum wand can help to reach those in tall corners
- Dust furniture, ceiling fan blades, blinds, and light fixtures
- Wash windows inside and out
- Clean out the refrigerator and organize cabinets
- Empty All trash cans
- Remove smoke stains from fireplaces
- Replace any worn-out rugs
- Wax hardwood floors
- Polish metal faucets and all mirrors
- If needed, re-caulk tubs, showers, and sinks
- Bleach or treat dirty and stained grout
- Hang up fresh, fluffy towels in the bathroom
- Clean and air out any musty smelling areas- do not rely on air fresheners
Step 2: Clean Out Clutter
Go through each closet, cabinet, shelf, and surface area of your home and get rid of everything you don’t need or use. Luckily, this isn’t as daunting of a task as it may seem: because you’re moving, you’ll need to do this anyway. Once all of your unneeded items are sold, donated, or thrown away, take it a step further: take everything you won’t need until after you move into your new place and place it in storage.
If your next home isn’t ready for move-in yet, renting a storage locker is a great way to get these extra items out of the house, or if you have already purchased your new home, move as much over as you can. Remember, most home buyers like to (and will) look inside closets, cabinets, and drawers. The less items you have out, the more spacious and clean the home will feel.
Step 3: Make Repairs – Even Minor Ones
Home buyers will notice even the smallest of flaws. To many of these can give off the impression that the home has been uncared for, and that there may be even deeper underlying issues or repairs that will need to be made. Here are some common repairs to consider:
- Fix any leaky faucets.
- Patch holes in walls.
- Repair any doors that won’t close properly and kitchen drawers that jam.
- If a door or drawer is squeaking, squirt the hinge or slide with WD-40 to see if that fixes the problem- if not, replace.
- Refinish cabinetry or wood trim that is worn, old, chipped or scratched, or tarnished.
- Replace burnt-out or old, outdated light bulbs with new, brighter, and more eco-friendly bulbs.
- Replace cracked floor or counter tiles.
Step 4: Paint Cabinets & Walls
Consider painting your walls and cabinets in neutral colors, especially if the current paint is chipped, peeling, or an overly bright color. The idea when picking out colors for a home that will be sold is to give off the impression of a blank canvas for the new owners.
Painting cabinets is a great way to transform an old, outdated kitchen without the huge expense or time consumption that would come with cabinet replacing or cabinet refacing. View our Before & After page to see some examples.
By going through and completing this list, you will find that putting in a few minor investments can pay off big time when it comes to not only how fast your home will sell, but the price you can expect!
Sound Finish Professional Cabinet Painting and Refinishing Services
Sound Finish Provides the highest quality cabinet coatings in the industry because cabinet coatings are our primary focus and our specialty. With 20+ years of experience, our unique system paints your kitchen cabinets in 2-3 days!
Learn more and schedule a consultation today!

Home staging is becoming a necessary part of home selling. While there are some simple and proven techniques to staging, such as cleaning, depersonalizing, etc., there are still quite a few common mistakes that could hinder or even prevent a successful sale of your home, and leave you receiving less value for your home than it’s true potential. Here are some of the most common mistakes that you should avoid when selling your home:
- Don’t ignore clutter. While that stack of books or magazines on your coffee or end table may seem clean and organized to you, others may not see it the same way. Enlisting the help of a friend, family member, or even staging professional to go on a mock-tour of your home, and invite them to point out any problem areas you may have missed.
- Don’t perform any major renovations. Unless a portion of your home is literally falling apart, this is not the time to spend a ton of money on new cabinets or replacing all the appliances. Some smarter investments? Simple upgrades like fresh paint on cabinets and walls and new fixtures or hardware will go a long way.
- Speaking of paint, don’t paint with dark or overly bold colors. Stick with neutral hues to avoid turning off any potential buyers.
- Don’t cover up the windows. Let in the light and show off the views from your home by avoiding the use of heavy, dark curtains. Keep the curtains a lighter color, and pull them open during showings.
- Don’t stick around during a showing. A potential buyer will likely feel uncomfortable discussing their opinions or concerns about a home with the owner present. You will need to trust that your real estate agent will show your home in the best light possible- after all, it’s their job.
- Additionally, if you have pets, do not leave them at home during a showing either. It’s important to keep in mind that not everyone enjoys pets, and some may be allergic or even afraid of them. Bring them with you during a showing- for dogs, this would be a great time to go to the park for some fun and exercise.
- Don’t over-stage or over-decorate. Simplicity is key. It can be easy to go overboard with decorations, but do your best to scale things back so that a room doesn’t feel cluttered or overpowered with decor or furniture.
- Don’t neglect outside spaces. Curb appeal is essential for a great first impression. Make sure gardens and planters are clear of weeds, dead growth, or other debris, keep the lawn mowed, and ensure that leaves are raked up during autumn. Add some outdoor furniture to the porch or backyard, and make sure that tools, children’s toys, or other items are put away.
- Don’t let the fridge and pantry get out of hand- just like your cabinets, potential buyers will likely open them up and take a peek during a showing. Clean them out and toss any old or expired items, and make sure that the refrigerator is free of any odors.
- Don’t list your home if it isn’t ready. Complete all necessary touch-ups or repairs, and only list it once you believe your home would be ready to wow buyers on a showing that very same day.
- And lastly, don’t be afraid to ask for help. Preparing your home for sale can be a long, stressful task, and at certain points you may not know where or how to proceed. Don’t hesitate to ask for advice from friends, family, or from real estate or staging professionals.
Sound Finish Professional Cabinet Painting and Refinishing Services
Sound Finish Provides the highest quality cabinet coatings in the industry because cabinet coatings are our primary focus and our specialty. With 20+ years of experience, our unique system paints your kitchen cabinets in 2-3 days!
Learn more and schedule a consultation today!

This weekend, come check us out at the Everett Fall Home Show! This annual event is Xfinity Arena’s largest vendor event of the year. Snohomish County’s premiere Fall event will feature hundreds of specialized local businesses.
Everett Fall Home Show Admission Information
The Everett Fall Home Show takes place at the Xfinity Arena, located at Broadway & Hewitt in Everett, WA 98201. The show is open Friday Sept 25th 12pm-7pm, Saturday Sept 26 10am-7pm, and Sunday Sept 27 10am-5pm. Admission costs are as follows: $7.00/adults, $6.50/seniors, free for ages 16 and under. However, a special promotion is taking place for the first time this year, where the first 1,000 people to register online will receive FREE admission for themselves and a guest! For details and to register, visit the Everett Home Show’s fall sign-up page.
Admission to the Fall Home Show also gets you into the Everett Gift Show, taking place in the East portion of the Xfinity Arena.
Come Visit Sound Finish Cabinet Painting & Refinishing!
If you are attending the Everett Fall Home Show, come and visit us at Booth #30!
Sound Finish Provides the highest quality cabinet coatings in the industry because cabinet coatings are our primary focus and our specialty. With 20+ years of experience, our unique system paints your kitchen cabinets in 2-3 days!
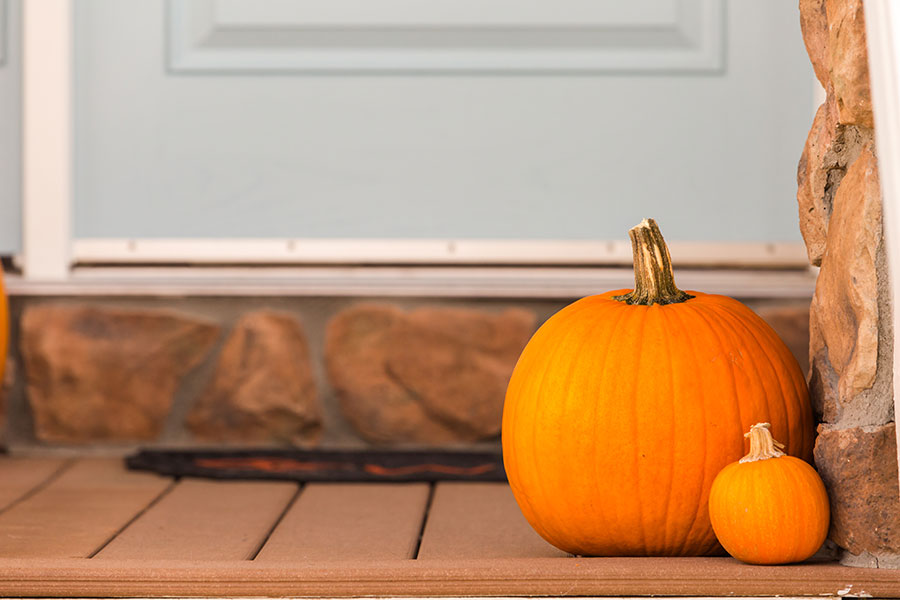
As the seasons change, so should your home staging strategy! Selling a home in fall can have certain advantages- for one, there are typically fewer homes on the market in autumn, meaning your house will have less competition. So take advantage of this colorful season through these fall staging tips and sell your home!
Autumn Decor
Fall is most well known for bright, colorful foliage, as well as two major holidays: Halloween and Thanksgiving. It’s a great idea to incorporate seasonal decor such as pumpkins, gourds, and sprigs of bright red and orange leaves and branches. Be sure to not go overboard, however. You don’t want your home to look like a pick-your-own pumpkin patch, nor do you want your home to look like the inside of a Halloween store. You can also embrace the fall season by keeping a carafe stocked with hot apple cider (or even pumpkin spice coffee) during open houses and showings. Offering apple cider serves two purposes: One, it keeps buyers happy, warm, and in the seasonal mood, and two, just having that cider smell present gives off a warm, welcoming feel.
Keep the Exterior Clean
Maintaining curb appeal will most likely take up more of your time than usual in autumn. For one, you will need to be constantly cleaning up as various foliage and plants die off or go into hibernation before winter. Don’t get behind on raking, and keep your garden clean of dead plants. It’s an ongoing process, so be sure to check your yard 1-2 times a week for any new die-off to keep your yard in good shape. Make sure your gutters remain clear of any debris. Additionally, check your entryway, patio, and siding for dirt, mold, and mildew, and clean the outsides of all windows.
Make it Move-In Ready
This is great advice regardless of season, but it becomes even more essential in fall as colder weather moves in. The last thing a buyer wants to do is see a problem that needs fixing, and know that it will either need to be done during winter, or be put off until next year when the warm weather returns. Drafty windows or door frames, leaky faucets, old carpet that needs replacing, these are just a few problem areas that a buyer will not want to deal with.
Be Prepared to Move Out Quickly
Chances are, if you sell your home in the fall, the buyer will want to move in as quickly as possible; they may have children who need to start at a new school, or they may simply want to get the moving process finished before winter sets in. Because of this, you will want to be ready to move out quickly. It’s strongly recommended to rent a storage container so you can pre-pack any and all of your family’s non-essentials. Leave only the items you will need during the next few months, as well as, of course, furniture and items that are being used as part of your staging. That way, when your home does sell, you’ll already be half-packed and able to leave the home quicker.
Sound Finish Professional Cabinet Painting and Refinishing Services
Sound Finish Provides the highest quality cabinet coatings in the industry because cabinet coatings are our primary focus and our specialty. With 20+ years of experience, our unique system paints your kitchen cabinets in 2-3 days!
Learn more and schedule a consultation today!